DEAR TIM: I am thinking about installing hardwood flooring. The hardwood flooring I want to use is the traditional tongue and groove 3/4-inch thick hardwood lumber. I own many different power saws and other carpentry tools. Do you think I can achieve nearly professional results as I try to install the hardwood flooring? What tips can you share to help me get professional results at do-it-yourself prices? Bob K., St. John's, Newfoundland CA
DEAR BOB: Since I don't know the level of your carpentry skills, I am going to say maybe. The traditional hardwood floor installation process is not that difficult, but the many different tricks and tips are what separate professional installers from those who aspire to have their years of accumulated knowledge.

You may also need a router equipped with a special bit. It is not uncommon for a professional to rip a piece of hardwood flooring to make it fit against an existing piece. To make the hardwood flooring pieces interlock, a new groove has to be created on the cut edge of hardwood.
The first thing you need to do before you start the job is get the hardwood flooring into your home and let it acclimate to the indoor humidity and temperature. Although this acclimation period can be achieved in three or four days, I recommend you bring the hardwood flooring into your home for a minimum of two weeks for the best results. Put the wood into the actual room where it will be installed if at all possible. Be sure that room is at the temperature it will be at once the room is finished. The longer you let the wood acclimate, the tighter the joints will be as it is installed, and, more importantly, after the hardwood is finished. Hardwood flooring is a hygroscopic material, and it can change shape and size with changes in temperature and humidity.
The subfloor to which the hardwood flooring is attached should be clean, dust-free and securely attached to the floor joists. Now is the time to attack any pesky floor squeaks. Most floor squeaks can be traced to loose subflooring that moves up and down as it is walked upon. The movement of the wood along the nail shafts creates the squeak. Screw down the existing subfloor to the floor joists, especially in areas of the floor where you will walk. Those areas covered with furniture may not be as important, but I would suggest you screw down the entire subfloor to the joists.

Click here to watch the video on eliminating that floor squeak.
Use a long metal straightedge to locate humps and low spots in the floor. The low spots should be filled in with floor leveling compound or better yet, asphalt shingles. If the low spots are very subtle, multiple layers of asphalt-saturated felt paper will work well. The entire subfloor should have a minimum of one layer of asphalt-saturated felt paper over it to protect the underside of the new hardwood flooring from water vapor that may try to work its way through the subfloor. The felt paper also helps keep the new hardwood floor quiet.

Whenever possible, the new hardwood flooring strips should be installed perpendicular to the run of the floor joists. For a creative look, you can run the new hardwood flooring diagonally across the floor joists. Running the flooring diagonally is more work, and will require slightly more material.
Be sure to install the strips of hardwood flooring in a random manner. Don't try to get fancy with respect to how the different pieces look. The bundles of hardwood flooring come mixed with all sorts of long, short and medium lengths. The more random the pieces are installed, the better the finished hardwood floor will look.
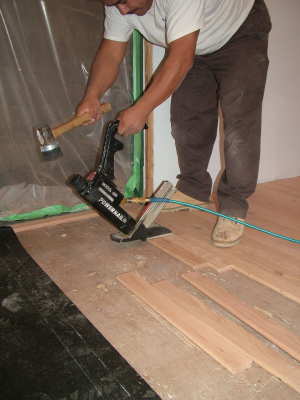
A rubber mallet is used by professionals to pound the new strips of flooring into place against the flooring already nailed to the floor. Each strip of new flooring needs to be tight along the long edge and the short edge where it butts against the piece next to it. You will notice that the tongue and groove feature of each piece of hardwood flooring not only is along the long edges, but also on the short stubby ends of each strip.
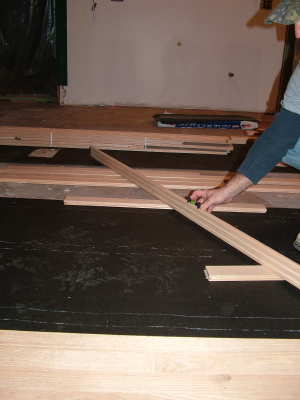
One of the most secret tips is reversing the direction of the tongues and grooves. Professional installers don't always start laying a floor on one wall and work to the far wall. They may start in the middle of the room for any number of reasons. When this happens, a special strip of wood that is the thickness of the tongue but twice as wide, is installed into the groove of the flooring.
This strip of wood allows the installer to start laying hardwood flooring going the opposite direction so the tongues of the strips are always exposed. The tongues of each strip of hardwood flooring must be exposed so you can nail the hardwood flooring to the subfloor.