Showing posts with label Ventilation. Show all posts

Whole House Fans

By
©1993-2012 Tim Carter

Summary: A whole house fan needs plenty of exhaust area to work properly. Turbines or pot vents will help remove hot air as the fan pulls it through the house.

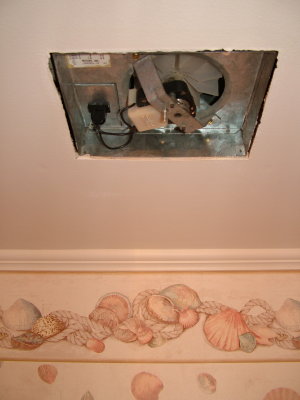
DEAR TIM: While doing a walk through inspection in our new home our builder indicated that he could not put in the whole house fan we wanted. The reason he gave was that both roof vents and eave vents had been accidentally installed. I believe he called them continuous ridge and soffit vents. The builder said the whole house fan would burn up and offered a credit to us. Is this correct? We really want the whole house fan. Kristi B., Manteca, CA

Dear KRISTI: Ooooops! What does the builder mean "accidentally"? The location of your home in the central valley of California needs as much ventilation as possible. If I was building your home, the continuous ridge and soffit ventilation would have been just one part of the roof ventilation package. The great news for you is that you can have the whole house fan installed and it will not burn up so long as your builder and roofer team up and install some extra roof ventilation products.

These simple pot vents are great exhaust ports for a whole house fan. You may need quite a few to satisfy the power of the fan.
Whole house exhaust fans come in different types and sizes. Their sole purpose is to move vast quantities of air. They work very well in climates that have moderate to low humidity. As the sun goes down and the outside air temperature begins to drop, a whole house fan can create pleasant breezes through any and all rooms of a house. Ask anyone who has one and they will tell you that even during peak summer months, they sometimes have to sleep under a blanket!

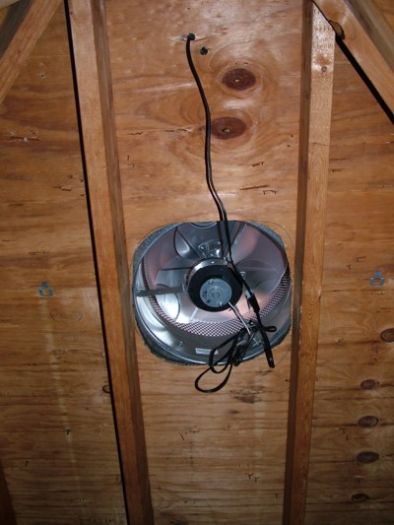
These fans pull hundreds and even thousands of cubic feet of air per minute into your home. For them to work at peak efficiency they have to push an equal amount of air out of the attic. If there are no places to exhaust air or the exhaust areas are small, the fan blade spins but it doesn't really push much air. Low air flow past the fan motor can cause it to overheat. Spinning car tires on snow and ice are a fairly accurate analogy. A car engine can rapidly overheat in this situation as the car's radiator is not moving through the outdoor air.

When you purchase a whole house fan the written instructions clearly state how much free net area of exhaust the fan needs. The net free area is often called out in square feet or square inches. But don't be fooled. If you cut a one square foot hole in your roof and cover it with some sort of cap, you do not have one square foot of exhaust opening. The insect screening or slits in the metal vent can cut off as much as 50 percent of the hole you created.

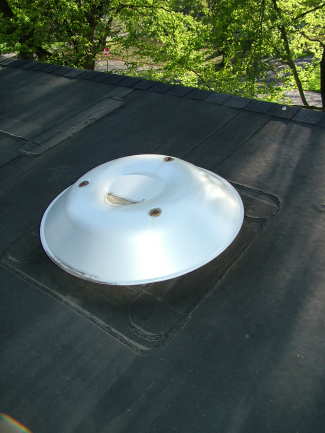
I always prefer to exceed this amount by 25 to 50 percent. One way to achieve this required ventilation area quickly is to install simple and affordable spinning roof turbines.

These wonderful roof ventilation products may not look as sleek as the hidden continuous ridge and soffit ventilation you already have, but they also allow massive amounts of air to readily escape from your hot attic space. What's more, they work anytime a slight breeze blows across your roof. I would install these on the back side of your roof so they are not visible from the street.

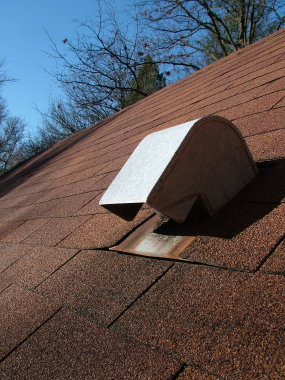
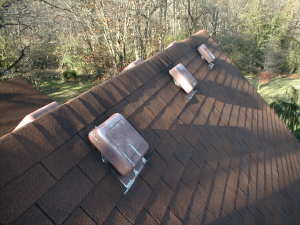
If you don't like roof turbines you can have your builder install simple static roof pot vents. These are very common roof ventilation products and they work well. I have them on my own home. But depending upon the fan you have purchased, you may discover you need 10 or even 15 of these pot vents to satisfy the whole house fan. Once again, place these vents on a part of the roof that is least visible from the ground.

Don't let your builder pull the wool over your eyes with an expensive change order for this work. The actual materials you need to provide the necessary ventilation for the fan will probably cost you less than $150.00. The time to install the products might be less than 4 hours. In my opinion, the builder should not charge you for the time since he already told you he was going to install the whole house fan in the first place. Necessary roof vents are a part of this package.

The spinning roof turbine vents are an excellent match for whole house fans. The beauty of them is that they do not restrict the amount of opening in the roof. In fact, when they spin either by wind power or air being pushed by the whole house fan, they exhaust far more air than they would if the hole in the roof was simply open to the atmosphere.

The truth be told, you can't have too much roof ventilation. Ask any farmer that raises chickens and they will show you how they ventilate the chicken houses since chickens can't sweat and need to be cool or they die.

Ventilating Attics in Hot Homes

By
©1993-2012 Tim Carter

Summary: Exhaust hot attic air in order to cool your living space. Attic ventilation in the form of turbine and pot attic vents work with the wind to remove the heat.

DEAR TIM: What is the best way to ventilate a Cape Cod style home that has a short knee wall in the upper level? I have asked three different contractors and received three different answers. The attic and second floor areas get stifling hot in the summer months. I am getting new shingles installed and thought this might be the time to make changes. Joan S., Royal Oak, MI

DEAR JOAN: You could have told me your house was a ranch, a colonial, tri-level, Victorian, etc. and my answer would be the same. High attic temperatures are a reality in just about any traditionally built home that gets direct solar radiation. I have been in attics in the middle of the summer where it was nearly impossible to breathe. Sweat burst from my skin within seconds of entering the inferno. My best guess put the temperature somewhere near or above 140F.

This Cape Cod home has multiple attic spaces that need to be ventilated. Turbine vents will be invisible from the street when put on the back roof surfaces.
Your Cape Cod home offers distinct challenges with respect to combating high temperatures and infrared heat. The bottom of the steep roof rafters typically rest on top of the first floor walls. As they rise and meet at the center of the house, they create a smaller liveable space on the second floor. Small vertical half or knee walls intersect the underside of the rafters. Most Cape Cod homes have a small flat ceiling area in the center of the second floor living area. The rest of the ceiling space is created by the underside of the roof rafters.

The slanted ceiling is a huge problem area. Many Cape Cod roofs are framed with 2 x 6s and on rare occasions, 2 x 8s. The small vertical knee wall allows carpenters to use smaller dimensional rough lumber. But this small lumber leaves very little space for both insulation and the required free air space above the insulation. Free air space above all insulation is a necessity. It is the conduit that permits the free flow of cool air through an attic space.

To effectively cool your attic, which in turn helps to keep the finished living space cool, you must constantly exhaust hot attic air. The air in an attic gets hot not unlike air that gets heated in a furnace. The actual roof surface temperature can soar to nearly 190F in direct sunlight on a hot summer day at noon. This intense heat passes through to the wood roof sheathing and wood rafters. Even though they do not glow as would a cooking element in an oven, they are radiating enormous amounts of heat. The air in the attic collects this heat and in turn transfers it to the insulation. The actual insulation gets hot and transfers its heat directly to the finished ceiling. This is called conductive heat transfer.

I love using Mother Nature's wind power to exhaust hot air from attics. Wind-powered turbine vents do a magnificent job of pulling vast amounts of hot air from attic spaces. These inexpensive devices can be installed by your roofers in less than 30 minutes. A typical home needs three turbine vents. I like to put them on the backside of a roof so they are barely visible from the front yard. Be sure to buy turbine vents that have external bracing instead of internal braces.

This Cape Cod home is easier to ventilate. Two turbine vents on the back roof will do a fantastic job so long as the front and rear soffit vents are clear and allow air to flow towards the turbine vents.
Electric-powered attic ventilation (PAV) fans will also move lots of air. But these fans can develop so much suction they can actually draw air from inside your home. If you use an air conditioner, this can be bad as you draw expensive cool air from your finished living space up into your attic. PAVs, as well as turbine vents, require abundant soffit ventilation or low-roof static pot vents that allow cooler outside air to readily enter the attic as hot air is exhausted.

I increased the comfort of my own home by installing radiant barrier chips. These highly reflective thin pieces of plastic act like mirrors and reflect heat back to its source. They work exactly like a piece of aluminum foil that covers a casserole dish. But a single layer of any radiant barrier can lose its ability to reflect heat if it gets covered with dust. This is why the chips are so much better. When the chips are installed tens of thousands of them float down onto the insulation. Look closely and you will discover that you might have six or seven layers of radiant barrier on top of one another. The top layer may get dusty over time, but the chips just below work like they are brand new.

Adding more insulation will not necessarily make a house cooler. In fact, it can add to the heat load after the sun goes down. Insulation is designed to slow the rate of heat transfer. That is great if you have a warm home and don't want heat to seep into a cold attic. But you want your insulation, especially that which touches up against your ceilings, to be as cool as possible. If the insulation is hot, it slowly liberates this heat back towards the attic.

The best way to keep insulation cool as well as attic air is to move lots of air through the attic space. Even though the outside temperature may be 90 - 98F, it is much cooler than 140 - 160F. Your home air conditioner works very hard to combat extreme attic temperatures. Lower the attic temperature even by 15 - 20F and you will save money and be cooler.

Roof Ventilation with Turbine Vents

By
©1993-2012 Tim Carter

Summary: Turbine vents can replace the hot air in your attic in minutes. Mother Nature blows across the fins in the roof turbine vents as they exhaust the heat build up.

The roof ventilation rage over the past 15 years has been continuous ridge and soffit ventilation. These systems are nearly invisible and they create a system through which air enters your attic space and then gently floats through the attic space. No matter what the time of year, the air exits the attic space through small gaps at the peak of the roof. These gaps are covered with any number of different products that allow air to pass, but prohibit rain, snow and insects from entering your attic area. You can't see these vents as they are almost always covered by the roofing shingles at the peak.

The mechanics of the air movement are quite simple. During warm weather, the air inside your attic heats up. Since warm air rises, it tends to float out of the high ventilation spaces. This convection movement naturally draws in cooler outside air to replace the air that just exited.

Wind that blows across the roof anytime of year also acts to vacuum air from the attic space. The wind blowing across a roof can create a partial vacuum on the leeward side of a roof. When the wind blows and at the right angle a significant amount of air can be pulled through the attic space.

But in my opinion, there is a better ventilation method that pulls vast quantities of air from an attic space no matter which direction the air blows. I am speaking of traditional wind turbine vents. Some people call these whirlybird vents. They are round metal vents that have fins in them and stick up from the roof surface perhaps 18 - 20 inches. The fins are located in a dome-shaped housing that spins each time the wind blows across it. The faster the wind speed, the faster the turbine rotates.

Turbine vents have been used for many years in both residential, commercial, agricultural and industrial buildings. The vents are very affordable, easy to install, and they pump vast amounts of air from attic spaces.

A small 12 inch diameter turbine vent with a constant wind speed of 5 miles per hour (mph) can remove 347 cubic feet of air per minute (cfm) from the attic space. A single 14 inch diameter turbine vent that is subjected to 15 mph winds can expel up to 1,342 cfm of air! If the winds are still, the vents still allow air to drift up and out of the attic space, although not nearly as much.

Those amounts of air might not mean much to you at first blush. But consider a moderately sized home whose attic space is 36 feet deep, 50 feet long and 10 feet high at the peak. This attic space contains 18,000 cubic feet of air. The single 12 inch diameter turbine vent could provide a complete change of air in the attic space every 52 minutes if the outside breeze was just 5 mph. The 14 inch diameter unit could provide a complete air change in the attic every 14 minutes at 15 mph. Imagine what happens if you install two or three of these simplistic turbine vents on the back side of your roof out of view?

Many people look at the vents and think they will leak during a rainstorm. The wind that almost always accompanies a rain shower or storm actually causes the turbine to spin and blow rain drops away from the vent. The same is true for snow.

The roofer your builder hires can install a turbine vent in less than 15 minutes. The average cost of a high quality turbine vent is just $50. The best ones provide years of maintenance-free service since they have permanently sealed ball bearings.

If you want the strongest turbine vent, be sure to buy one that has external braces. These are simple metal braces that extend out beyond the spinning turbine. These visible braces do a fantastic job of stabilizing the turbine when the winds are really blowing.

Crawl Space Vents

By
©1993-2012 Tim Carter

Summary: Crawl spaces collect and condense water vapor. Crawl space ventilation is necessary to prevent mildew or rot. Vapor barriers may provide better protection than crawlspace vents.

DEAR TIM: Should I keep my crawl space foundation vents open year round? Are they really necessary? I live in Maryland and get all four seasons and temperature conditions. Stephen King, Lexington Park , MD

DEAR STEPHEN: There are thousands of people who wonder what to do with crawl space vents. In fact, years ago when I installed them in room addition projects I often thought about the science behind these smallish vents that didn't seem to let in much air at all into the crawl spaces. I would actually be in the crawl spaces on windy days and could barely feel a puff of air come through the vents.

Here is the reasoning behind crawl space ventilation. Take a clear piece of plastic and place it over what appears to be very dry ground in your yard. Put some boards around the edges to weight down the plastic so no air gets under the large plastic sheet. If you can do this on a sunny day you will get almost instantaneous results.

This vent is open now.  But should it be closed in winter and open in summer or closed in summer and open in winter? PHOTO BY: Tim Carter
This vent is open now. But should it be closed in winter and open in summer or closed in summer and open in winter? PHOTO BY: Tim Carter
I'll bet within minutes you start to see a slight fog develop on the underside of the plastic. Wait longer and the fog will turn to water droplets. The soil around your house and inside of crawl spaces is constantly liberating water vapor. Sunlight, wind and natural evaporation pull this moisture from the ground.

The moisture content of the soil drives this water vapor engine. People who live in the extreme arid parts of the Southwest USA have little water vapor escaping from the soil for much of the year. But even they have a monsoon season and the soil does get wet at certain times of the year. People who live in the Northwest, Northeast, Midwest, and Southeast have water vapor streaming from the soil year round.

In the open parts of your yard, this water vapor readily escapes to the atmosphere. But under a crawl space, this water vapor can collect and begin to condense on the foundation walls and the subfloor structure. If the subfloor is wood, the water can create mildew in short order and eventually the wood will develop wood rot.

The theory for many years was to install the crawl space vents so that outside air could get into the crawl space and lower the relative humidity. But I am here to tell you that I have been in many crawl spaces with plenty of open vents and I felt as if I was in a damp cave. I just feel the vents do little good to circulate enough outside air into the confined crawl space.

The better idea, in my opinion, is to install a high-performance vapor retarder over the soil in the crawl space in addition to the building code-required foundation vents. This vapor retarder needs to lap up onto the sides of the foundation and be secured to the wall with treated lumber or rot-resistant wood strips. The best vapor retarders come with special tape that allows you to permanently seal any seams where the vapor retarder laps over itself or is cut around objects that stick up through the ground in the crawl space.

These vapor retarders block the water vapor and effectively cancel out the need for the crawl space vents. But be careful: My theory may not be synchronized with your local building code if you decide to build another room addition. They may make you install them. No matter what you do, always be sure to check with your local building department and obey the building code in your area.

Some local building departments have adopted code modifications that allow a variation of my theory. They permit installation of the vapor retarders as I describe and do not require any foundation vents. But if you do not install vents, you must insulate the side walls of the crawl space and the heating contractor must pipe in a small amount of conditioned air into the space. Furthermore, the foundation insulation must be fireproof or if it is not, it must be covered with a fireproof material.

The bottom line is if you install the high-performance vapor retarders correctly, you can forget about your vents. I don't care if you keep them open or closed, it will make little difference.

Crawl space ventilation is another prime example of how the building code can be argued to be a set of minimum specifications. The building code is indeed a wonderful set of regulations, but it by no means offers a builder or a homeowner the best possible way to do a task. There are countless examples of where builders can go beyond the code and do extra work or use better materials that will produce a home that will last hundreds of years instead of perhaps 40 to 70 years.

Water is a serious menace when it comes to residential construction. It can create havoc and misery when leaks develop or even simple water vapor condenses on crawl space floor joists, attic framing or even exterior walls. The best defense against water vapor problems in crawl spaces is to keep the water in the soil and don't let it enter the crawl space at all. The same is true for concrete slabs poured on grade. Always install a high-performance vapor retarder under slabs to stop water vapor from seeping through the concrete.

Author's Note: We've received other questions about similar problems. Here's one from Marilyn W. in Troy, MI.

"I read your answer concerning musty smells coming from crawlspace and slab foundations. The musty smell is in our cottage. Part is a slab and part is a modified crawlspace that we can not get under. The space is too small and there is no entry. If we remove the carpet and spray the the floor with the liquid water vapor barrier, would this take care of the smell? It is closed a good part of the year, and when we do open and use it, the smell permeates everything including our clothes, hair etc. Please help us make our cottage usable. Thanks!"

Bathroom Fan Ventilation

By
©1993-2012 Tim Carter

Summary: Bathroom ventilation fans or dryer exhaust fans shouldn't be vented indoors. Vent exhaust air to the outside of your home to prevent mold or mildew from condensation.

Related Articles: Ducted Bathroom Fan, Bathroom Exhaust Fan Leaks Cold Air, Bathroom Exhaust Fans, Bathroom Exhaust Fans Video

DEAR TIM: I'm remodeling a second floor master bathroom and will be installing a new ceiling-mounted ventilation fan. The fan itself will only be three feet from an exterior wall so I could easily extend an exhaust pipe through the attic and have it terminate at the soffit overhang. Do you see any problems with this method? I can extend the exhaust pipe towards a roof ventilation hole but I am worried that water might condense and run backwards towards the fan. What would you do? Larry L., Bloomfield Hills, MI

DEAR LARRY: I can only think of one other method that might cause more damage and destruction than the two methods you have proposed. Some builders, subcontractors and unknowing do-it-yourselfers simply let bathroom exhaust fans blow air directly into the attic space. Talk with any seasoned certified home inspector and she / he may tell you tales of horrible attic mold and wood rot in the roof framing and roof sheathing.

Here is a special roof termination cap for the fan exhaust.  There is a flapper damper  just inside the outlet that stops insects and cold backdrafts from entering your bathroom. PHOTO BY: Tim Carter
Here is a special roof termination cap for the fan exhaust. There is a flapper damper just inside the outlet that stops insects and cold backdrafts from entering your bathroom. PHOTO BY: Tim Carter
You are definitely thinking about doing the right thing by getting the exhaust air to the exterior, but dumping it under the soffit might create massive problems for you. The moist humid air that is exhausted when someone is showering will create a vapor plume at the exhaust fan vent. Some of this cloud will waft over the soffit and dissipate into the outdoor air, but some of the sinister water vapor will sneak its way into the attic space through soffit ventilation intake vents, cracks and gaps in the actual soffit materials and seams between the gutter board and soffit.

When this moist air gets into the attic, it will readily condense into liquid water on the cool or cold attic framing surfaces. This liquid water is the needed spark to ignite active mold growth and fungi growth that causes wood rot. The actual buildup of water on these surfaces can turn to a thick layer of frost in very cold weather. I have seen it and it is a very eery feeling.


I have found that it is often best to vent fans and dryers through the roof. I urge you to watch this video of mine to see how easy it is to install the correct vent-cap flashing on a roof. Have no fear - if done right you will have no leaks.


This same problem can happen if you extend a bathroom exhaust fan and terminate it at or near a rooftop ventilation hole. Some of the air may make it outdoors, but some will undoubtedly find its way to other places in the attic. The best way is to simply extend the pipe through the roof and end it with a special bathroom exhaust fan termination cap that includes a damper.

I prefer to use smooth galvanized steel pipe to duct the air from the fan to the outdoors. Your concern about condensation forming inside the pipe is valid. It can and does happen to thousands of people because the installer failed to insulate the pipe. For this task, I prefer to use spray foam that comes in an aerosol can. Clean the exterior of the pipe with a rag soaked in mineral spirits to remove the residual oil film from the manufacturing process. The pipe should be covered with at least 1.5 inches of dried cured foam, and you must cover all of the exposed metal pipe from the fan all the way to the exhaust termination cap at the underside of the roof.

The spray foam is partially applied in this photo. I wanted you to see some of the smooth steel pipe. Note how the spray foam extends all of the way up to the wood roof sheathing.  You want to coat any and all exposed metal with the spray foam. PHOTO BY: Tim Carter
The spray foam is partially applied in this photo. I wanted you to see some of the smooth steel pipe. Note how the spray foam extends all of the way up to the wood roof sheathing. You want to coat any and all exposed metal with the spray foam. PHOTO BY: Tim Carter
Be sure the foam insulation is approved by your local building and fire inspector for use in your attic space. Some local codes do not allow flammable insulations in accessible locations.

Don't try to wrap the pipe with standard fiberglass insulation attached with duct tape. High attic temperatures can cause many traditional duct tapes to deteriorate in attics. If you want to wrap the pipe, use special duct insulation and tape that can be purchased at heating and cooling supply businesses.

If you do not feel confident installing the exhaust fan termination cap in the roof, hire a roofer to do this. It is really not that hard, but it is a job that must be done correctly to ensure you have no leaks from rain or snowmelt.

Never underestimate the amount of damage simple water vapor can do. This danger is real for all homeowners, even those who live in very dry climates. Those who live in warm humid climates are at grave risk for rapid mold growth and wood rot. Don't think for a moment that you are immune from damage because of where you live.

It is also very important to install the exhaust piping as directed by the fan manufacturer. Short runs are better and you can only insert in the line a given amount of bends in the piping. The pipe and bends create friction to the moving air. If you install too much pipe or too many bends, the fan motor simply will not be able to push the air to the exterior of your home.

Whole House Fan in Cathedral Ceiling

By
©1993-2012 Tim Carter

Summary: Whole house fans provide enormous air movement through out your home. Install one in a home with a cathedral ceiling. It can be done.

DEAR TIM: We are in a perfect area for installing a whole house fan, central Colorado, with cool dry evenings, but trying to get one installed in an existing structure is proving to be almost impossible. We have a ranch style home with a walkout finished basement and the upper floor has a great room concept with all cathedral ceilings. With no attic to speak of we are unsure where or how to have a whole house fan installed. The only feasible mounting location is either on an exterior wall (very unsightly) and the fan would actually be exposed to the elements (not sure if this is even possible) or one inner wall that is adjacent to the garage attic but is also a separate room (laundry), still has the high ceiling but air flow would be restricted by the doorway. Also, most whole house fans I have seen are for attic horizontal mounts. We would have to have a fan mounted vertically and I haven't seen any at the local home improvement stores. We had some remodeling done on the interior and tried repeatedly to get them to do the installation and I never saw so much stalling and side stepping. Needless to say they avoided the issue entirely. No one wanted to go into the garage attic in the summer either. Wayne, Black Forest, CO

DEAR WAYNE: Perhaps the altitude is affecting all of those builders and remodelers. One option open to you immediately popped into my mind, but in all fairness, I am only at about 750 feet above sea level here and have put whole house fans in all sorts of homes.

To make the fan work well, you really only need two things:

  • a flat interior ceiling surface
  • sufficient roof exhaust ventilation ports to satisfy the free net area called for in the fan installation instructions.

The second item is the tough one in your case.

To create the flat interior ceiling space, all you need to do is locate the fan in a portion of the house where you are willing to give up the sloped ceiling effect. Perhaps, there is a smaller room you can transform into a flat ceiling.

Then above this space, you need to install the needed roof vents that collectively will satisfy the free net area, so the whole house fan can push the air from the house outdoors.

I did this once in a job several years ago, where we had to join together eight traditional pot vents next to one another near the peak of a roof. It looked a little odd, but the vents did their job.

Bathroom Exhaust Fan Leaks Cold Air

By
©1993-2012 Tim Carter

Summary: Bathroom exhaust fans can dump cold air into rooms if they are not installed correctly. There are several places the cold air enters the bathroom fan exhaust pipe and room. Inferior, low-quality fans are often the problem.

Related Articles: Bathroom Fan Ventilation, Ducted Bathroom Fan, Bathroom Exhaust Fans, Bathroom Exhaust Fans Video


DEAR TIM: My husband and I purchased a small ranch home built in the 1950's. A year ago we installed new exhaust fans in the bathrooms, kitchen and basement. Last winter I noticed cold air would fall out of the fan covers when the fan was not operating. The small bathroom is now the coldest room in the house. Did we make a mistake? Why is cold air coming into the house? Because heating costs are rising, we must stop or minimize the cold air infiltration. Jill L-H., Maumee, OH

DEAR JILL: My gut reaction is that you did nothing wrong. My experience tells me that you probably didn't do some extra things that would have made a big difference. Unfortunately these extra added touches don't come as part of the written instructions with many exhaust fans. I have never seen these tips on a sheet of paper. When you install as many fans as I have, you start to learn what works best.

Let's briefly discuss the dynamics of what is happening with the exhaust fans. I assume you used the suggested smooth-metal piping to connect the fan to the exterior of your home. My guess is the bathroom fan exhaust pipe is located in a cold attic space. If so, the pipe gets very cold when the fan is not in use. This cold pipe can cause the air inside the pipe to go from warm to cold. Cold air is denser and heavier than warm air and wants to go down, not up. This is why you feel it fall down out of the exhaust fan cover.

This exhaust fan has a built-in damper, but most fit poorly allowing cold air to drift back into a home. PHOTO CREDIT: Tim Carter
Cold air from the attic can also be entering the joints in the metal piping if they are unsealed. It is an excellent idea to use real duct tape that heating and cooling contractors use to seal ducts. This is a special tape you often can only find where furnaces, air conditioners and ductwork are sold. Do not confuse this professional tape with the common duct tape sold at home centers and hardware stores.

The fan itself should have an internal flapper damper that is supposed to block cold air, but these dampers usually fit poorly inside the fan housing and air can seep by them. I prefer to install a roof cap that is made to compliment the high-quality exhaust fans I install. These self-flashing exit caps have a great flapper damper with a felt seal that really closes tightly when the fan is not in use. Virtually no air works its way back down my exhaust pipes so long as the flapper is checked annually for dirt and debris buildup.


I have found that it is often best to vent fans and dryers through the roof. I urge you to watch this video of mine to see how easy it is to install the correct vent-cap flashing on a roof. Have no fear - if done right you will have no leaks.


It is also a great idea to insulate the metal pipe in any unconditioned space where it passes. If the metal pipe is in a cold attic space but well insulated, the pipe should not get cold as some of the warm air from your house will drift up through the fan and into the exhaust pipe.

I prefer to spray the metal exhaust pipes with foam insulation. This insulation is available in aerosol cans and is quite easy to work with. Be sure to clean the exterior of the metal pipe with soap and water as the metal pipe often is coated with a fine film of oil from the manufacturing mill. Wear very old clothes when working with the spray foam. Many foams have a urethane component and if the urethane foam gets on the clothes and dries, you can't get it off.

Be sure the entire length of the exhaust pipe is insulated all the way from the fan to the underside of the roof where it exits the house. This insulation will provide a secondary benefit by preventing or minimizing condensation inside the exhaust pipe. Many people think they have a roof leak during winter months as the exhaust fans operate. In most cases the water is simply condensation that forms against the cold sidewalls of the exhaust pipe and then runs downhill back to the fan.

Not all exhaust fans are created equal. Some have low-powered fans that can barely push open the first flapper damper much less the second flapper at the roof. As with many consumer products, the things that work better and are more reliable often cost more. When you shop for fans you will be shocked to discover it only costs a little more money to get a very high-quality fan.

Keep in mind that your house should also be equipped with a makeup air intake port. When exhaust fans, clothes dryers, central vacuum cleaners, fuel-burning furnaces and water heaters and fireplaces operate, they consume vast amounts of air. It is entirely possible that back drafting is happening in the bathroom fan exhaust pipe as it becomes the point of entry for air needed by another appliance that is sucking air from the house.

Makeup air intake ports can be as simple as a clothes dryer exhaust cap that has holes drilled in the flapper. I have also seen small hoods where the flapper is removed and small galvanized hardware cloth is inserted in its place. These makeup air intake points should be located in the utility room where furnaces and water heaters are located.

Clothes Dryer Vent Leaks in Ceiling

By
©1993-2012 Tim Carter

Summary: Clothes dryer vents can actually create water leaks. If the clothes dryer vent pipe gets cold, the warm, moist air inside condenses and turns to liquid water. This water can leak from the vent pipes if the seams are not taped. The best way to stop clothes dryer vent pipe leaks is to make sure the pipe does not get cold.

Related Articles: Installing a Vent, Clothes Dryer Vents, Dryer Vent Tables, Vent Hood Manufacturers, Dryer Vent, Condensation Sources, Fight Condensation, Cause and Control

DEAR TIM: I live in a condo on the ground floor. My dryer is located in a closet in my bedroom. My dryer duct is routed from the back of my bedroom out into my living room ceiling where it connects to the dryer vent. Lately I have noticed a leak in my living room ceiling. The plumber found the dryer vent to be leaking at the elbow. What could be causing this? Please help, I'm living with a large hole in my ceiling and am unsure what to do. Alexandra N., Bedminster, NJ

DEAR ALEXANDRA: The leak is being caused by condensation that is forming either inside or outside of the actual clothes dryer vent pipe. That part of the pipe is getting cold and the very moist hot air from the clothes dryer is turning into liquid water as it gets closer to the exterior of the condominium's exterior wall. To stop the leak, you must keep the entire length of dryer vent pipe nice and warm.

To do this job correctly, you may have to enlarge the hole in the living room ceiling to expose the entire length of the dryer vent pipe. This may seem radical, but the drywall repair person can fix a larger hole in just about the same time as it takes to fix the small one created by the plumber who discovered the source of the problem.


I have found that it is often best to vent fans and dryers through the roof. I urge you to watch this video of mine to see how easy it is to install the correct vent-cap flashing on a roof. Have no fear - if done right you will have no leaks.


First, you need to caulk around the hole in the exterior wall where the dryer vent pipe exits your condominium. I'm willing to wager that cold air is leaking in this location and it allows the exhaust pipe to get cold. But only perform the caulking if the correct exhaust pipe is installed.

Clothes dryer vent pipes should be made from smooth, rigid metal dryer duct of at least 4 inches and no longer than 25 feet. Be sure that you have a minimum amount of 90 degree bends in the pipe. Each 90 degree bend produces the same amount of resistance to air flow as ten linear feet of straight pipe. Most clothes dryers limit the total length of vent pipe run, so you must pay attention to this installation requirement. You can find this information in the clothes dryer instruction manual.

If you use either of the metal pipes, tape all seams with real heating and cooling duct tape. This tape is meant to be used on steel or aluminum ducts. Do not confuse it with the common gray duct tape sold in all hardware stores and home centers. Heating and cooling duct tape has special adhesives and often a very shiny outer surface.

The final step it to completely insulate the outside of the clothes dryer vent pipe as it travels across the entire living room ceiling to where it exits your condominium. The insulation must be expertly installed and no part of the metal vent pipe must be exposed. You can use regular fiberglass insulation for this task. If you simply want to fill the entire joist space cavity with insulation, that will work. If you want to just wrap the pipe with thinner insulation, be sure you use the special duct tape to keep the insulation tight around the dryer vent pipe.

Once you have performed all of this work, it is time to repair your ceiling. Be sure there is plenty of insulation in the ceiling joist cavity near the outside wall. If you decide to just insulate the pipe, then be sure to completely fill the cavity with fiberglass insulation extending back four feet from the exterior wall towards the center of the room. This will block the cold from entering the ceiling cavity where the clothes dryer vent pipe is located.

Whole House Fans and Attic Fans

By
©1993-2012 Tim Carter

Summary: Whole house fans and attic fans are often confused. Solar attic fans are a new group of products that use solar energy to move hot attic air. Attic exhaust fans remove hot air from attic spaces, while whole house fans remove hot air from both living spaces and the attic at the same time.

DEAR TIM: What is the difference between a whole-house fan and an attic fan? Which is the best one to have in a home? What is the best way to cool a home using these fans? Can either of these fans cause problems? Renee H., Littleton, CO

DEAR RENEE: Whole-house fans and attic fans are as different as apples and watermelons. Both fans move air just as apples and watermelons are both fruit, but the similarities end there.

A whole-house fan is a fixture that is often located in the ceiling of a home. In rare occasions, they can be located in a wall. This fan might be in a hallway or some other central location of the home. The fan is always located on the highest ceiling or wall and oriented so that it blows air directly into an attic space.

This attic fan can also be called a powered attic ventilator (PAV). They are often visible on the outside of a house either on the roof or on a side wall of an attic gable. Whole-house fans are located inside homes. Both perform entirely different functions. PHOTO CREDIT: Tim Carter
A typical whole-house fan moves vast amounts of air. The blades of the fan can be large, and they can have significant pitch so they can move thousands of cubic feet of air per minute. Turn one of these bad boys on inside an average-sized ranch home that has 2,400 square feet of finished floor space, and you can replace every bit of stale, hot inside air with cooler outside air in less than five minutes.

These fans are designed to pull air through a house and exhaust the air into an attic space. Since you live in a area that has low humidity, they are superb and highly efficient cooling devices. They work best when they are operated in the early evening or night hours as outdoor temperatures start to nosedive and the inside air temperature of a house is still high. As outdoor humidity rises, the cooling effect from whole-house fans drops.

An attic fan is completely different. These are smaller fans designed to move hundreds of cubic feet of air per minute out of your attic area only. They are not supposed to move air through your home. The cooling principle here is simple: If you replace the extreme hot air inside an attic that might be 140-160F with air that is 85-95F, the inside of your home should also be cooler. The heat gain from extremely hot ceilings adjacent to hot attics can stress air-conditioning systems, and push them to the limits of their ability to cool a home.

For both fans to work properly, they need to easily exhaust the air to the outdoors. The attic fans do this by default, as you typically have to cut an opening in the roof or a side wall of an attic to mount the fan. The attic fans also need lots of intake air vents along the lower edges of the roof. Continuous venting is the best and the air from the outdoors needs to be able to easily enter the lower reaches of the attic where the roof passes over the outside walls of the house. Since most attic fans are located high up on a roof, this design allows for excellent cross ventilation of the entire attic space.

If you do not provide enough intake air vents for attic fans, they can draw air from inside your home. This happens because the moving blades of the fan create a partial vacuum. It is not a good idea to send cool air from the inside of your home up into an attic, since you are paying good money to cool inside air with an air conditioner.

Whole-house fans also need plenty of exhaust air vents through the roof or through side gable walls of attics. Each whole-house fan manufacturer tells you for each size fan how much net-free area of exhaust ventilation the fan requires to work properly. If you do not provide this exhaust ventilation area, the fan blades will spin, but not move the maximum amount of air.

Whole-house fans serve double duty as they remove hot air from the attic as they work. But you do not necessarily want the whole-house fan operating in the middle of the day as your attic heats up. For this reason, it makes sense to have both types of fans in a house. They operate at different times of day and night, since they are designed for two different purposes.

Whole-house fans work so well, they are often equipped with timers. If you operate one all night long, you might need to sleep with blankets. They often can cool a house to a comfortable temperature in just several hours.

You can get concentrated cooling with a whole-house fan by opening the windows in selected rooms. As the fan operates, it creates a comfortable breeze in the rooms with open windows. Be sure you do open windows before you turn on a whole-house fan. If you do not and you have a fireplace with ashes in it, you will create an ash storm as air is sucked down the chimney and rushes across the dry fireplace ashes. The dirty ashes are then broadcast through the house as they are sucked towards the whole-house fan. How do I know this? It is the voice of experience talking.

Dryer Vent

By
©1993-2012 Tim Carter

Summary: Dryer vents need to be cleaned on a regular basis. The flapper door on exterior dryer-vent housings must be checked for lint buildup. If lint builds up on the flapper to such an extent that it will not close completely when the dryer is off, all sorts of interesting things can crawl inside your vent and dryer.

Related Articles: Installing a Vent, Clothes Dryer Vents, Vent Leaks in the Ceiling, Dryer Vent Tables, Vent Hood Manufacturers, Condensation Sources, Fight Condensation, Cause and Control

I received this very interesting dryer-vent story from Steve L., who lives in Southern CA with a seemingly harmless variety of small wildlife. He shared this tale in the hopes that other people will be spared the olfactory misery he had to suffer.

The other day, I found a small mouse in my side yard where our dryer vents. I chased him from his hiding place and thought I had him cornered next to some recycling boxes near the dryer vent. I moved the boxes a bit to find that he had made a little bed out of vented dryer lint. Then in a flash, he darted toward me a few inches and then hopped right up into the dryer vent (the dryer was not on at the time).

I had never looked at the workings of this vent because it has one of those angled covers that directs the air down. I didn't want the mouse setting up shop in there so I ran in the house and turned the dryer on a minute, hoping to scare him out. I went back outside and saw no sign of him. I figured he probably ran away or, worst case, would crawl out when he got hungry.

That must have been a couple days ago. Well, today our laundry room really started to stink. I immediately suspected the worst. I pulled the dryer out and disconnected the few feet of flexible metal duct between the dryer and the wall.

I gingerly carried it outside. I looked inside and what do you know, a dead mouse sitting right in the 90-degree angle fitting that was attached to the back of the dryer. That mouse died within an inch of the inside of our dryer.

Here's how it all happened: I discovered that our exhaust vent has one big flap under that external angled cover. Years of lint had propped it open by about half an inch. I figure that little bugger was able to jump up nose first into that half inch opening and squeeze himself inside. His big mistake was crawling too far inside. The inside flexible ductwork followed an upside down U pattern. I think he was able to crawl up the incline from the hole in the wall to the top of the inverted U but then fell down the longer other side. He was not able to climb back up from the floor level where the exhaust exits the dryer to the top of the inverted U. Tough luck.

That duct has been thoroughly scoured and reinstalled and everything is back to normal. I'm now highly motivated to check that exhaust vent every week when I take out the trash. I also changed the course of the flexible ductwork. It now follows more of a C pattern, which hopefully won't be as challenging for any future invaders.


I have found that it is often best to vent fans and dryers through the roof. I urge you to watch this video of mine to see how easy it is to install the correct vent-cap flashing on a roof. Have no fear - if done right you will have no leaks.

Ceiling Fans

By
©1993-2012 Tim Carter

Summary: Ceiling fans can keep you cool and save lots of money. Not all ceiling fans work well. The best ceiling fans have balanced motors and blades. Ceiling fans keep you cool the same way a hurricane forms in the ocean. You can install ceiling fans anywhere you need cooling, even outdoors on a covered porch.

Ceiling fans are a great way to provide both comfort and style to any room of you home, even ones outdoors. I have multiple ceiling fans in my own home, and am thinking of adding more. But I just don't buy any brand, as over the years I have learned that ceiling fans are like many other things. If you want a ceiling fan that will operate quietly and reliably, then you must pay more money when you buy the fan.

Ceiling fans come in different sizes, and this is important to keep in mind depending upon the size of the room you are trying to cool. If the room you are trying to cool is larger, always get a ceiling fan that has a blade span greater than 50 inches.

The way a ceiling fan works is very simple. As we perspire, the heat from our bodies is transferred to the liquid perspiration on the surface of our skin. When a breeze blows across our skin, it evaporates the liquid perspiration. As the liquid sweat turns into water vapor, it takes the heat from your body into the air. This is the exact same mechanism that fuels monster hurricanes. Heat from the ocean water is carried up into the gathering storm as the warm ocean water evaporates. .

This ceiling fan is in a large sun room. PHOTO CREDIT: Roger Henthorn
To achieve maximum cooling, a ceiling fan has to move lots of air. The distance the fan is from the ceiling and the tilt or pitch of the fan blades must be optimized. If a ceiling fan is too close to a ceiling, say six inches or less, it can't easily get the needed air to push down towards the floor. Just the same, the fan blades must have a tilt to them so they cut through the air and push it down. Airplane and ship propellers operate the same way. They slice through air or water to push objects that weigh many tons.

Ceiling fans that have a blade pitch of 15 degrees work very well. Those fan manufacturers that take the time to perfectly balance the fan blades and mounting hardware do even better. As the fan blades spin around, they need to be balanced just like a car wheel or a washing machine. If you have ever heard an out-of-balance washing machine rattle when it is in its spin cycle, then you know why it is important to have balanced ceiling-fan blades.

Ceiling fans can save you lots of money on air conditioning costs. If you use a ceiling fan in the early parts of the day before the sun bakes your home, you can get effective cooling in the room you are occupying. There is no reason to air condition the entire home if you are just in one place within your home. A ceiling fan uses only a fraction of the electricity that is required to operate a central air-conditioning system.

A smaller ceiling fan for a kid's bedroom. PHOTO CREDIT: Roger Henthorn
If your home is well-sealed, the air inside will still have a lower relative humidity from the operation of the air conditioner the day before. This lower level of humidity will help evaporate the sweat from your skin, even if you don't feel yourself perspiring.

I think it is a great idea to install ceiling fans in all bedrooms, kitchens, family rooms, or any room where you might sit to relax or work. I would also place a ceiling fan on a covered screened porch or even a patio that has some type of awning or other cover to keep rain water from falling onto the fan.

Keep in mind that even when a fan is operating at a very slow speed, it can provide enough cooling to keep you very comfortable. The fan does not need to be blasting you with air as if you were in a gale.

Be sure to purchase a ceiling fan that can be operated with a speed control. Many models have built-in micro processors that allow you to set the fan speed from a wall control. What's more, the fan motor can spin in reverse to pull air up from the ground in winter months. This reverse action takes warmer air from a ceiling and distributes it to lower levels in the room.

Bathroom Exhaust Fans

By
©1993-2012 Tim Carter

Summary: Bathroom exhaust fans are vital components of your home's ventilation system. Bathroom fans not only exhaust offensive odors, they also pipe vast amounts of humid air to the exterior of your home. Bathroom vent fans come in all types and sizes, but I prefer the ones that have the fan motor located in the attic. These residential bathroom exhaust fans are the quietest ones I have ever used, and they are extremely powerful.

Related Articles: Bathroom Fan Ventilation, Ducted Bathroom Fan, Bathroom Exhaust Fan Leaks Cold Air, Bathroom Exhaust Fans Video


DEAR TIM: I have several inexpensive builder-grade exhaust fans in my home. They are noisy, and I don't feel they do a good job of getting rid of the moist air produced while showering. Is it possible to get high-performance ventilation with little or no noise? I would like a bathroom exhaust fan with a light. Can you tell me how to install a bathroom fan so I do not cause any damage to my home? Faith F., Mt. Crawford, VA

DEAR FAITH: Bathroom fans are a critical part of a home-ventilation system. A bathroom exhaust fan, improperly installed, can create all sorts of hidden damage to a home. All too often, installers just let the moist air escape into an attic space. This moist air can condense on the cooler surfaces in the attic. This liquid water on the wood surfaces creates mold and can lead to serious wood rot.

The good news for you is that the exact fan you are looking for is available. It has been around for years, but many builders choose to install cheaper fans to try to make their houses more affordable. The trouble is, I have discovered many consumers would gladly pay a slight upcharge if they were given the option of having great ventilation and less noise while in the bathroom. It is my hope that builders start to learn to offer home buyers more choices. But I feel that day may never come, as builders will argue that more choices equate to more problems.

This fan may look like an overweight flying saucer, but rest assured it does a fantastic job of vacuuming moist air from bathrooms. PHOTO CREDIT: Tim Carter
I have had fantastic luck installing bathroom exhaust fans that are actually located in the attic space. They resemble central vacuum systems inasmuch as the fan motor is located perhaps 8 or 10 feet away from the bathroom. Most builder-grade fan motors are just inches away from the bathroom ceiling. This is one reason why they are so noisy.

These remote bathroom exhaust fans have insulated flexible duct pipe that extends from the fan motor to small exhaust inlet boxes that are attached to the framing members in your bathroom ceiling. The box extends up into your attic, and all you see on the bathroom ceiling is a sleek round inlet cover. The powerful fans can slurp up massive amounts of moist humid air that rises to the ceilings as you shower. This air is ducted through the roof of your home in a special roof vent cap that is easy to install.


I have found that it is often best to vent fans and dryers through the roof. I urge you to watch this video of mine to see how easy it is to install the correct vent-cap flashing on a roof. Have no fear - if done right you will have no leaks.

The flexible insulated ducting that extends from the roof to the fan, and then to your bathroom ceiling, does two important job: It helps to suppress noise from the fan, and the insulation prevents condensation from forming inside the flexible piping. Many people complain about a leaking bathroom fan, when in fact the water is not a roof leak but condensate water that forms inside of uninsulated exhaust piping and flows down the piping into the bathroom.

The bathroom exhaust fans I use come with or without lights. The ones with lights use brilliant compact halogen bulbs that fit into the center of the small circular vent covers. I always place two of these inlets with lights in each bathroom, one immediately adjacent to the shower area and the other toward the center of the bathroom. These lights produce good overall lighting for the average bathroom. You will need additional lighting above any mirror.

To avoid damage to your home while installing a bathroom fan, always follow the written instructions that come with the fan. If you are not comfortable working with high-voltage electric wire so it will pass inspection, then hire a competent electrician to connect the fan. The most important aspect is to duct the air from the bathroom to the exterior of the house. You should do this through the roof.

Avoid the temptation of venting your fan through the horizontal soffit that can be found in many roof overhangs. All too often the moist air billows up under the soffit and is sucked into the attic. If this happens, mildew and wood rot is a certainty.

Problems with bathroom exhaust fans can happen years later. The connections between the flexible duct pipe, the fan, inlet boxes and the roof vent cap must be permanent. Never rely on duct tape to secure these connections. The high heat and humidity in attics can cause duct tape to fail. It is better to use metal band clamps that are nearly identical to traditional automotive radiator hose clamps. These inexpensive clamps can be found at hardware stores, ductwork shops and some home centers. Once the band clamp is connected, then use tape as directed by the fan manufacturer.

Be sure there are no kinks in the flexible duct pipe. Also be sure to install a makeup air duct in your home that allows an equal amount of fresh air to enter your home for every bit of air the exhaust fan is expelling. If you do not have this critical makeup air, you could cause "backdrafting" to occur. This means poisonous gases are drawn into your home through furnace or water heater exhaust pipes.

Solar Powered Attic Fan

By
©1993-2012 Tim Carter

Summary: Consider an attic fan if your attic gets as "hot as blue blazes." There are solar attic fans available. They work great on a sunny day. But the solar powered attic fans do not work on cloudy days or when the sun goes down. However, the attic still has hot air inside at sunset.

DEAR TIM: My attic space gets as hot as blue blazes. I saw an advertisement for a solar-powered attic fan and that seems like a great way to remove heat and reduce my carbon footprint. Do these fans really work, and are they hard to install? Will the fan significantly reduce the temperature inside my attic? What are the pros and cons to these solar attic fans? Brad L., Phoenix, AZ

DEAR BRAD: I installed a solar-powered attic fan last year to see how well it would work. The installation went like clockwork. I had decided to do the work early in the morning while it was cool on the roof. Within an hour after installing it, the sun hit the solar panel and the fan blades started to spin. It was almost magical to see the solar attic fan work.

You are a pretty clever guy to get the sun to do double duty. It makes perfect sense to make the sun cool your attic space, since it is the source of the problem in the first place. As for reducing your carbon footprint by not using electricity from a power plant, I can't tell you if the solar fan you might buy will be that environmentally friendly. The manufacturing process used to make your solar fan might actually be quite carbon positive. But in any event, you are doing the right thing by trying to use a solar-powered fan.

This solar panel produces enough electricity to power a spinning fan in the round ventilator on the roof behind the panel. But the fan only works when the panel is basking in sunlight. PHOTO CREDIT: Tim Carter
There are pros and cons to solar-powered attic fans. The biggest pros are they work for free using the suns rays, and they do exhaust hot air. The solar fans do not require the services of an electrician to connect. They are also very quiet.

But after seeing my solar-powered attic fan work, I have a list of cons. My fan only works when it is getting direct sunlight on the solar panel. If a cloud drifts through the sky blocking out the sun, the fan stops spinning immediately. As the sun sets, the attic is still hot and my solar fan stops spinning.

The fan I have moves 800 cubic feet of air per minute (CFM) when the sun is shining directly on the solar panel. If the angle of the sun is lower in the sky (morning and late afternoon) or the sun's rays are trying to cut through thin clouds or haze, the fan spins slower moving less air. The single solar-powered attic fan I have has not lowered the temperature in my attic at all. I took precise before and after temperature readings.

To significantly reduce the temperature in your attic, you need thousands and thousands of CFMs of air moving through the attic space. What's more, this air needs to continue to move through the attic space after the sun sets to remove the residual heat from the roof framing lumber, roof sheathing, roofing materials and the attic insulation. Yes, the insulation in your attic gets very hot during the day and then holds that heat long after the sun sets.

If you are going to go solar, I urge you to by several solar-powered attic fans. You will need them. Furthermore, consider buying ones that have a solar panel that can be located away from the actual fan. My solar fan has this neat feature. This allowed me to put my solar fan on the rear portion of my roof so you don't see it from the street, while the solar panel is on the part of my roof that faces due south.

You want the solar panels located on the roof where they will not be shaded by trees, and where they will get direct solar power from Noon until sunset. This is the hottest part of the day, that part where you need the fan blades spinning at full speed.

Solar-powered attic fans require a hole to be cut in the roof, possibly two if you purchase one that has the remote-panel location feature. If you do not know how to properly flash these fan housings into the roof shingles, then you should hire a qualified roofer. It is not hard to do the work, but there are very important steps that must be followed to have a leak-proof installation.

When installed properly on a roof with standard asphalt shingles, solar-powered attic fans do not require caulk, roofing cement or any other product to prevent leaks. A great roofer will cut the shingles and lace the fan housing into the shingles so that rain will stay outdoors where it belongs.

If your attic space is over 1,800 square feet, you will need enough solar fans to move 8,000 CFM. You need that amount of air, if not more, to get any sort of cooling benefit from the fans. Intense sunlight can create heat faster than one or two small fans can cool an area. If you want to see how to properly cool attic spaces, visit a chicken farm. These farmers use giant fans that move tens of thousands of CFM of air that keep the chickens alive.

Kitchen Exhaust Fan

By
©1993-2012 Tim Carter

Summary: Kitchen exhaust fans have to be sized properly for your kitchen. Overhead exhaust fans capture the smoke and grease mist that could coat your kitchen surfaces. Some of the cook exhaust fans come with built-in lights.

DEAR TIM: My new kitchen plans call for a new kitchen exhaust fan. To be more precise, a kitchen hood exhaust fan has been suggested. Is one kitchen stove exhaust fan more effective than another? Years ago the down-draft exhaust fans were popular. What exhaust fan is in your kitchen if you don't mind me asking? How do I make sure the kitchen exhaust fan I select will adequately ventilate my kitchen? Where does the replacement air enter the house? Kathleen K., Exeter, NH

DEAR KATHLEEN: You are asking all of the right questions about your new kitchen exhaust fan. All too often, I see builders and remodelers fall down here. Either the fan installed is not powerful enough for the size of the kitchen, the installer fails to vent it properly, or overlooks the need for makeup air.

You really need a good kitchen exhaust-fan system if you cook greasy foods and boil foods. The cooking process often creates both visible particles as well as an invisible aerosol mist of grease and smoke that can coat the surfaces of your kitchen if they are not vacuumed and exhausted to the exterior of your home. Even with a great exhaust fan, you can still develop a fine coating of grease on light fixtures, cabinets, walls and ceilings. This is the voice of experience talking.

PHOTO CAPTION: This high-powered kitchen exhaust fan is tucked up under a decorative hood. It is sized properly for the large kitchen.  IMAGE CREDIT: Tim Carter
PHOTO CAPTION: This high-powered kitchen exhaust fan is tucked up under a decorative hood. It is sized properly for the large kitchen. IMAGE CREDIT: Tim Carter
I prefer the overhead kitchen exhaust fans rather than the down-draft ones simply because hot air rises. Why not use that physical axiom to your advantage and collect the cooking vapors with a hood?

My kitchen exhaust fan is matched to the size of my kitchen. The fan is a powerful three-speed model that has brilliant halogen bulbs that are built-in to the fan. There are three removable grease-collector screens that we take out regularly and put into our dishwasher. When the fan is on the highest fan speed, it sucks 1,100 cubic feet of air per minute (CFM) from above our cooktop and pushes it outside.

The fan is connected to metal ductwork that extends from the fan all the way to the roof of my home. Each joint in the ductwork was carefully taped with special metal-foil duct tape by my ventilation contractor. It is very important that no air seeps from the duct to other parts of the house. If that were to happen, hidden spaces in your home could become grease-covered posing a significant fire hazard.

The exhaust from my fan exits the roof through a special roof cap that is made to handle that much air flow. It was easy to install so that rain does not enter the house.

Sizing a kitchen exhaust fan is fairly easy. Many experts simply measure the square footage of the kitchen floor and multiply that by two to arrive at the cubic-feet-per-minute of output for the fan. For example, since my kitchen is 350 square feet, I would need a fan that must exhaust at least 700 CFM of air flow. My fan can do that on its middle speed, and the highest speed produces the massive 1,100 CFM of air movement.

You are really observant to recognize that large kitchen exhaust fans like these have a voracious appetite for air. In today's modern homes sucking that much air out of a house can cause serious back drafting issues if a makeup air inlet is not installed. Back drafting can cause deadly carbon monoxide to be drawn back down a chimney or metal vent pipe and/or smoke or smoke odors from fireplaces.

Newer homes are so airtight that when air is sucked from a house by a powerful fan, it replaces that air with air from outdoors through the path of least resistance. That path could be a furnace or water-heater vent, a chimney, or other vent that is open to the atmosphere. Installing a makeup-air vent solves this problem in almost all cases as outside air can easily flow through this device into the home.

Before you buy a kitchen exhaust fan, it is always a good idea to get the written installation instructions from the manufacturer. These documents will often contain sizing guidelines as well as detailed step-by-step methods the manufacturer wants you to follow to keep the warranty in force. Reading these ensures that the fan you are considering is the right size and that you can satisfy the minimum installation requirements.

Resist the temptation to use smaller ducting for the fan. Some people think that the size of the exhaust piping is not that important. Believe me, you must use the exact pipe as called for, and be sure that you do not exceed the maximum length of pipe allowed.

Pay particular attention to the bends in the exhaust piping. The written instructions will almost always tell you to avoid 90-degree bends, and how many can be put in the exhaust piping. These hard bends in the pipe create significant restrictions that make it hard for the fan to exhaust the air from your kitchen.

Attic Fan

By
©1993-2012 Tim Carter

Summary: An attic fan can help lower excessive attic temperatures. Solar attic fans are available, but have limitations. Electric powered attic fans are available with thermostats to help conserve energy. Wind-powered turbine vents are another option, but require Mother Nature to supply the power.

DEAR TIM: I know I need an attic fan to cool my hot attic. But there are many different types of attic fans. Should I consider a solar attic fan or some other attic exhaust fans? What type of attic fan do you use? How much air do I need to move through my attic to make a significant difference in the temperature? How important are soffit vents in this system? Pam W., Green Bay, WI

DEAR PAM: Attic fans are an effective tool to use to help lower excessive attic temperatures. As you might imagine, I have used many different types of fans, and have formulated opinions based upon experience and some accurate data I have collected over the years.

I believe the first thing to realize is that it takes massive amounts of air moving through an attic to create significant cooling. Farmers who raise chickens can attest to this as the buildings and barns that house chickens are usually equipped with massive fans that move tens of thousands of cubic feet per minute (CFM) of air. Even then, it is almost impossible to drop the temperature to that of the air temperature outdoors.

This attic fan looks impressive, but it moves less than 1,000 cubic feet of air per minute. That small amount of air has not lowered my attic temperature.  PHOTO CREDIT: Tim Carter
This attic fan looks impressive, but it moves less than 1,000 cubic feet of air per minute. That small amount of air has not lowered my attic temperature. PHOTO CREDIT: Tim Carter
Think of the dynamics of what is happening on a blazing summer day when the sun is pounding relentlessly on your roof. The temperature of the shingles soars. They can easily approach a temperature of 150 F or possibly more. This heat then transfers to the roof-framing materials. The trusses, rafters and roof sheathing get very hot. All of these things radiate heat much like the coals of a fire or a hot radiator.

The heat that is released is infrared energy that passes through air and starts to heat up solid objects like the insulation and anything stored in the attic. To cool these things down, the heat needs to be transferred to something else that can store the heat. The only thing available is the water in the air that is moving through the attic.

I am currently testing a specific solar attic fan. I have two identical units installed in my attic. The solar panels get sunlight until mid-afternoon. At that point my entire roof is in the shade created by two massive trees. Unfortunately these two fans have not done anything to reduce the attic temperature. The day before I installed them it was a cloudless day and the attic temperature at Noon was 129 F. When both fans are operating at Noon, the temperature has never been below 128 F. Each fan claims to move 800 CFM of air. The fan blades do spin rapidly, and I have good soffit intakes as well as windows in my attic that allow air to freely enter the attic space.

The trouble with solar attic fans is they stop working as soon as a cloud blocks the sunlight. On partly-cloudy days, the temperature can be beastly hot, and the fan blades simply stand still for much of the time. After the sun goes down, the attic can still be stifling hot, and there is no hope of air movement since the sun is not powering the fans.

Powered attic fans that get a constant supply of household electric will move lots of air. But you need to have quite a few operating to feel a difference. Many of these fans are equipped with thermostats so they will turn on and off automatically. This is a handy feature that saves energy.

You can install wind-powered turbine vents as well. When the wind blows hard, these fans can exhaust lots of air. But since the performance is tied to the wind speed, you can't count on these to work at peak performance in the hottest part of the day.

You need great soffit vents to supply the attic with all of the replacement air. Powerful fans that are exhausting air from your attic work best when they can get ample amounts of makeup or replacement air from outdoors. The lack of soffit vents may cause the fans to draw air up from the inside of your home. If you are running air conditioning, this can cost you dearly as your air conditioner will work harder to keep your home comfortable.

I have come to the conclusion that it is impossible to have too much attic ventilation. But achieving this can be a challenge aesthetically. Many people do not want the surface of their roofs cluttered with fan housings, or twirling vents. Those people who have experienced hurricanes will be the first to tell you that any hole in a roof is very problematic when the wind starts to howl relentlessly for hours.

There is no silver-bullet solution when it comes to attic fans. There are models that work best in certain parts of the nation and this same fan may do a poor job in another geographic area. Your house may not be sited well for solar or wind-powered solutions.

Those fans that are powered by household electricity probably hold the best promise as they will move tremendous amounts of air and do so until the attic temperature has dropped significantly. Your challenge will be installing enough of them to keep your attic temperature just above the outdoor temperature on the hottest day of the season.

Buy it Now