Showing posts with label Cabinets. Show all posts

Functional Kitchen Design Ideas

By
©1993-2012 Tim Carter

Summary: Kitchens are, by far, one of the most popular remodeling projects at this time. Even in new construction, kitchens receive great attention. Our changing lifestyles and interest in health make the kitchen a central room in the house. In many homes, the kitchen is the most heavily used room. If this is true in your case, then you want the room to be as functional as possible. Function doesn't happen by accident. You need to think and plan. Following are some ideas that you might want to consider when a kitchen remodel job or new home is on the horizon.

Related Articles: Cabinets, Wholesale Cabinets

Dishwashing

Consider elevating your dishwasher. If you elevate your dishwasher by nine to 12 inches, you will be surprised how easy it is to load and unload. Never again will you have to bend over! This idea causes the countertop, in many instances, to be interrupted. The resulting platform is an excellent height for a microwave, TV, or radio.

Lighting

Give serious consideration to both direct and indirect lighting. This means using recessed lighting to cast light on specific work areas and using indirect light for general lighting purposes. Fluorescent lights hidden above wall cabinets can produce magnificent results if disguised well and balanced within the room.

Sound Considerations

Kitchens are noisy places. The materials in kitchens also don't help matters much, as they easily reflect or bounce sound. Consider cork flooring, which is easy on your feet and absorbs sound (see Bulletin Cork Flooring Products). Also, if an island is in your plans, consider building walls around three sides. Make these walls 42 inches high and insulate the walls. The extra height walls provide a great place for electric receptacles. Also, insulate the walls between the kitchen and other rooms of the house if possible. Insulate the ceiling as well. Attempt to reduce sound producing activities. By using pull-out drawers for pots and pans, rattling will be kept to a minimum.

Windows

If you have a window at your sink, consider enlarging it so that the sill of the window becomes an extension of the countertop. It is a dramatic effect and also can serve in certain instances as a convenient pass thru for outside dining.


Avoid flaws and mistakes when planning your new kitchen. Use my Kitchen Remodeling Checklist as your remodel guide. I offer a 100% Money Back Guarantee.

Hidden Waste

Absolutely make every effort possible to put garbage cans and recycling cans in pull out or tilt out cabinets. Open waste containers in the room are unsightly.

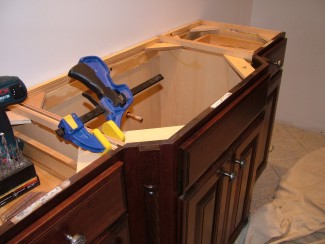
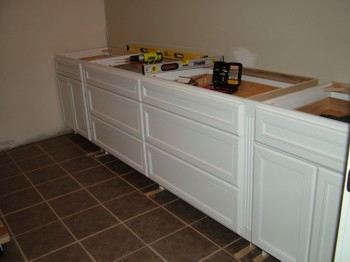
Distinctive Cabinets & Countertops

Your cabinets and countertops make up the largest components of your new kitchen. Do whatever you can to personalize these items. For example, if your budget will permit choose a cabinet line which has matching complimentary trims such as crown molding, valances, etc. These items can dress up the tops of cabinets or the room by continuing the cabinet theme towards the ceiling.

Countertops can be highly customized. The edges of countertops, even plastic laminate, can be easily individualized. Different color laminates or pieces of wood can be added to countertops with dramatic results. Solid surface countertop material offers virtually unlimited design possibilities. These materials can be shaped just like wood. This means that you can use any router bit to create the edge of your liking. Countertops, when done properly, will make or break a kitchen design. Spend some time and find the best fabricator in your town.

Entertainment Centers

By
©1993-2012 Tim Carter

Summary: Entertainment centers are now designed to house all of your electronic gear, look like beautiful pieces of furniture or even look like built in wall units. Be sure you measure carefully and consider all of the needs of your equipment such as pocket or glass doors.

DEAR TIM: My television, VCR, stereo receiver and DVD player are a jumbled mess. Add to this my collection of tapes and you can see I need some organizational help. Is it possible to arrange all of these things in a set of beautiful cabinetry without going to the poorhouse? Where does one start? What should I include in this entertainment center? Eric M., Boston, MA

DEAR ERIC: Talk about being at the right place at the right time. I have seen the design emphasis shift to different parts of a home on a fairly regular basis. Recently the home office was in the cross hairs of the design professionals . Before that it was the master bedroom bathroom suite. Years ago it was the family room. One of the current hot spots of interior home design happens to be an entertainment room for those that afford this luxury. For those of us that can't, a wonderful affordable alternative has come of age- the entertainment center.

This photo doesn't do my center justice. The camera makes the center look like hobbit furniture.  The center is nearly 15 feet wide! That is a cool custom coffee table with two working model trains under the glass top.
This photo doesn't do my center justice. The camera makes the center look like hobbit furniture. The center is nearly 15 feet wide! That is a cool custom coffee table with two working model trains under the glass top.
Many of the cabinet companies that have made kitchen and bathroom cabinets for years saw this trend emerging. These companies decided to expand their cabinet line to offer a multitude of specialty cabinets that you can mix and match to create a highly functional entertainment center that will house all of your electronic gear. The look of these centers is stunning. Just last month I installed a set of factory made cabinets that appear as if they were custom made for my basement space.

In a matter of speaking, my cabinets were custom made. My wife and I selected the style, the wood species- we used real cherry wood- and the stain color. A professional designer who worked for the cabinet retailer developed a plan for us after we supplied her with the width and height of our opening. Because our available space was nearly 14 feet wide, the designer was able to include a huge TV cabinet, tall storage cabinets, drawer bases and bookshelves. If your available space is just eight to ten feet wide, you can create a deluxe center.

Your entertainment center TV cabinet must have fold away pocket doors. These doors open and fold back along the inside of the cabinet. Lesser quality cabinets have traditional doors that open and swing back in front of the other cabinetry next to the TV cabinet. If your VCR, DVD player and cable TV box are in cabinets next to the actual TV, these solid wood doors will block the hand held remote control signals. Glass doors are a must if you decide to place your remote controlled equipment in these areas. Keep in mind that electronic equipment produces heat. This heat can damage the sensitive circuit boards and micro-chips within the equipment. Be sure that air can flow naturally up and over the equipment to cool it off.

A close-up view of the left side of my center that was made by putting together standard factory cabinets and trim!
Look for cabinets that are available in different heights and depths. The primary cabinet is almost always the TV cabinet. It can be as tall as 84 inches and as deep as 29 inches. The cabinets next to the massive TV cabinet are slightly shorter- 789 inches- and only 22 inches deep. This multi-layered design creates depth and makes for a highly interesting appearance. To achieve a total custom look, try to include filler strips that have fluted overlay strips of wood or accent blocks where you can attach decorative rosettes. Roping and other thin decorative overlay wood molding pieces also add character. If at all possible try to include open shelving to display books and other decorative items. Don't forget to include decorative crown molding that will really create that custom look.

There are booby traps you need to avoid. Check and double check again your measurements. The best advice is to have the cabinet designer or a professional installer come to your home to take the measurements. Don't try to fit too many different cabinets in a smaller space. Be careful about designing a cabinet(s) for a particular piece of electronic hardware. Technology changes so rapidly that a newer or replacement model simply may not fit well into the space you created.

I encourage you work with a professional designer. Many cabinet showrooms employ such people. They are trained to take advantage of every option should your situation allow for it. You can help them by providing them with photographs or with pages torn from a magazine that show different entertainment center concepts that appeal to you. To insure that the designer is up to your task, ask for photographs or plans of entertainment centers he/she has designed.

Home Entertainment Centers

By
©1993-2012 Tim Carter

Summary: The lives of many people are centered around television entertainment centers. All you have to do is observe my younger kids. Add to that the rich sound you get from compact discs and the clear picture you get using DVDs and it is easy to understand why entertainment centers are fast becoming the focal point of many American homes. How does the cabinetry in these units compare with kitchen cabinets?
Furniture Grade

Entertainment centers have been around for a long time in one form or another. Years ago, a visit to a furniture store would yield two or three different types of centers that were made to house all sorts of stereo equipment. Your choices going this route were pretty limited.

You could also contract with a custom cabinet builder to construct a center that had all of the bells and whistles. But this path was often taken by the wealthy and those who had just hit the lottery.

The fast growing trend of entertainment as a whole caught the eye of the cabinet companies that for years produced kitchen and bath cabinets. They were already set up to produce stock and semi-custom cabinets. Providing different entertainment center possibilities was not too much of a stretch for them. The result is a huge dividend for ordinary consumers such as you and I. You can visit just about any kitchen cabinet showroom and walk out with a brochure showing you all sorts of entertainment center cabinets. These different components can be mixed and matched to fill just about any alcove or wall space that you wish to dedicate to home entertainment.

Assembly Tips

The cabinets used in entertainment centers are not much different from regular kitchen cabinets. Well, that isn't entirely true. Some of the cabinets are huge! Take my TV tower for example. The cabinet was so big that I had to cut it into two pieces to get it down my basement steps! Be sure you think about this before you sign a custom order!

How did I cut this cabinet without any visible signs of damage after it was reassembled? Two things worked in my favor: first, the TV tower was 6 inches taller than all of the rest of the cabinets. Who would know if I shortened it by 1/4 inch? Second, the cabinet had nearly full coverage drawers below the TV area. These drawers covered the cabinet frame to such an extent that you can only see 1/8 inch of frame on either side of the drawer front.

My father-in-law, who builds cabinets as a hobby, suggested that I use a router with a brand new 1/4 inch bit to do the job. I built a frame that was attached to the covered sides of the TV tower that the router glided on to keep the cut straight and uniform. The result was perfection. Unless I point out the fine line on the sides of the cabinet, you can't tell where I cut it.

The High Spot

Before you start to install a wide expanse of cabinets like mine, you need to find the highest spot in the floor. Then reference this spot in relation to the TV tower. I found that I had to shim up my TV tower 1/4 inch to make sure that its bottom was level with the highest spot in the floor.

I then installed the TV tower first and worked away from this cabinet going to each corner. One of the things that made assembly simple was that the different cabinets had different depths and heights. This actually makes alignment rather easy.

The only aspect that is critical is to make sure the heights of the side cabinets were in line. This makes installing the decorative crown mold a cinch.


Creating the Design for My Center

I didn't do the plan for my entertainment center. It was important to me to make sure that the available space was fully utilized and that the look was superb. This is why I made sure a professional designer created the plan for my entertainment center.

I urge you to visit a local cabinet company that just sells cabinetry. They usually have trained planners who have taken many design courses and often are tested before they are granted a certification.

The extra time spent working with a professional will pay off because they know where problems happen and how to maximize a design for your needs.

Replacing Cabinets

By
©1993-2012 Tim Carter

Summary: Replacing cabinets is exciting. The hardest part is deciding between custom kitchen cabinets, semi-custom cabinets or stock kitchen cabinets. Each has their own special quality. Try to find cabinets that have the Kitchen Cabinet Manufacturers Association certification seal.

Related Articles: Wholesale Cabinets, Kitchen Design Ideas

DEAR TIM: My husband and I just got back from looking for new kitchen cabinets. We are so confused! We know what stock cabinets are, however, there doesn't seem to be a big difference between semi-custom and custom cabinets. What is the difference? Can you offer any suggestions regarding current trends? Also, is there a standard of quality that manufacturers must meet? J. T.

DEAR J.T.: Your confusion is very understandable. Many of my customers have returned from a day of cabinet shopping dazed and confused as well! A large part of the problem lies in the huge variety of styles, types of cabinet construction (frame vs. frameless), finishes, and accessory trim pieces. Do not underestimate the time it will take you to view all of the options that are available to you. Often it can take 2 - three days to visit different cabinet shops.

Semi-custom kitchen cabinets are factory-produced on assembly lines. Manufactures of these cabinets often allow you to select specific door styles, wood species, and stain finish types. These cabinets usually offer a wide variety of interior options such as cutlery trays, drawer dividers, towel racks, cookie sheet holders, trash can holders, etc. Often these cabinets are built using stock cabinet sizes. Separate cabinets are butted against one another in a typical installation. Some manufactures offer custom size possibilities.

Custom kitchen cabinets are made solely for your kitchen. They result from extremely specific measurements and detailed design criteria. They can be very personalized, down to exact drawer sizes for specific items. Often these cabinets are made by local fabricators who can produce furniture grade quality.

Custom cabinets offer a unique feature. A fabricator can assemble a single base cabinet or wall cabinet that is 6 - 8 feet long without seams. This cabinet can have a variety of doors, drawers, etc. depending upon your wants. Because it is one piece, installation time is minimal.

Current design trends appear to be leaning toward making kitchen cabinets look as close to furniture as possible. Some manufacturers offer a wide variety of accessory trim pieces such as crown molding, valances, cabinet legs, and highly customized appliance panels. These items, when professionally installed, can produce dramatic effects.

There is a minimum standard of quality which you should look for. This quality standard has been developed by the Kitchen Cabinet Manufacturers Association (KCMA, www.kcma.org). The quality standard covers virtually every aspect of the cabinet's construction. Joint tightness, hinge, doors, rigidity, corner bracing, finishing details, and other details are checked in a series of more than 60 specific tests. These tests are conducted by independent testing laboratories approved by the KCMA.

Cabinets which pass these tests are eligible for the KCMA certification seal. Manufacturers must regularly provide cabinets for testing in order to continue to bear the KCMA certification seal.

You should pay particular attention to the finishing process and types of finish that your cabinets will receive. Remember that the KCMA standards, just like many standards, are minimum quality standards. Many normal foodstuffs, such as vinegar, fruit juices, olive oil, and mustard can possibly damage cabinet finishes that do not meet KCMA standards. Some detergents, alcohol, and water can also harm finishes. Ask detailed, specific questions regarding the number and types of finish coats that your cabinets will receive. Ask how thick the combined layers of finish are. Ask if the finish will dull or yellow with age. Remember, the finish takes the abuse, not the wood.

Wholesale Residential Kitchen Cabinets

By
©1993-2012 Tim Carter

Summary: Cabinetry of any type is available in a wide range of styles and quality. This is especially true with respect to residential kitchen cabinets. You can purchase economy grade cabinetry or ultra-custom cabinetry in virtually any style. The ultra-custom cabinetry is manufactured specifically for you and is often made to the same exacting standards as the finest furniture. As you might imagine, there is a wide range of possibilities between economy and custom!

Related Articles: Cabinets, Kitchen Design Ideas

The KCMA Connection

The kitchen cabinet (and bath) manufacturers realized some time ago that they had to gain the respect of consumers and designers (those who specify certain cabinets). To do so, they had to develop minimum quality standards which acted as a yardstick by which to measure cabinet quality.

They did this through their association, the Kitchen Cabinet Manufacturers Association (KCMA, www.kcma.org). This association developed a set of guidelines by which cabinet quality could be measured. These guidelines are met by performing over 60 separate tests on cabinets. These tests measure performance characteristics of a cabinet's structure, construction and finish.

It is extremely important for you to realize several things. First, a cabinet manufacturer can manufacture several different lines of cabinets. Just because one line passes the test doesn't mean that the manufacturer is allowed to certify all of the cabinet lines he produces. Each line must pass the tests separately.

Also, the testing standards used establish minimum quality guidelines. This means that you might not be satisfied with the quality of a cabinet, even though it has passed all of the tests! I know that homeowners have a wide range of quality standards. Some people are perfectionists and demand perfection from every other human being. Perfection is a tough standard.

Remember that the quality standards can be exceeded. In other words, a high quality manufacturer can go way beyond the standards in an effort to produce a high quality cabinet. This will cost more, however, you may see that the value is there. When looking for cabinets, look at all the different lines and cost ranges. See what really distinguishes one line or manufacturer from another.

The Cabinet Tests

As I mentioned before, there are over 60 different tests which are used in the certification process. Following is a list of some of the major components that are tested.

Construction

Cabinet joints are checked. They look to see that they are tight.

Hinges are checked. The connection points between the hinge, cabinet, and doors are checked for tightness.

Doors are inspected for alignment. There must be no binding when doors operate.

Face-framed cabinets must have rigid frames.

Frameless cabinets (those with full overlay doors and drawers) must be constructed of thick enough material so as to be rigid.

The materials used in constructing the cabinets must be suitable to resist grease, water, steam, solvents, detergents, etc.

All exposed edges of plywood or composition board must be filled and sanded, edge banded or otherwise finished.

All exterior nail holes or staple holes must be filled.

Base cabinets (those that rest on the floor) must have a toe space. This space must be a minimum two inches deep and three inches high.

Structure

Cabinet shelves and bottoms are loaded to 15 pounds per square foot. After seven continuous days of loading, the cabinet is checked for deflection and separations.

Wall cabinets must be able to support 500 pounds without failure.

The cabinets are subjected to several different impact tests to see how they perform. These tests are designed to simulate everyday events which send objects crashing into cabinets.

Cabinet doors are tested for performance. They are opened and closed through 25,000 cycles. After this test is completed, the door must be in as good a shape as it was in the beginning. The hinges must not be loose and the door must still be in alignment.

Drawers are tested the same way. They are loaded with 15 pounds and opened and closed 25,000 times. They also must perform flawlessly at the conclusion of the 25,000 cycles.

Finish

One of the finish tests involves placing a door in a hotbox for 24 hours. The temperature inside the box is 120 degrees F and the humidity is 70 percent. At the conclusion, the finish must show no appreciable discoloration, no blisters and no checking.

A similar test is performed by subjecting the door to alternating hot and cold temperatures. After five cycles, the finish must not be flawed.

Finishes are tested by applying vinegar, 100-proof alcohol, mustard, lemon juice, etc. for one hour. The finish must survive unaffected. If minor blemishes are present, they must be able to be removed with ordinary polishing methods.


As you can see, the tests are tough. However, you and your kids may be able to dish out greater punishment. You simply need to use common sense prior to making a purchasing decision.

KCMA Certified Cabinet Manufacturers

For an up-to-date list of certified cabinet manufacturers, go to the "Directory of Certified Cabinet Manufacturers" page of the KCMA web site.

Important Note!

Many of the listed manufacturers make several different lines of cabinets. They may choose to have only one line or several lines certified. Be careful!! Insist on written documentation that the cabinet line you are purchasing has, in fact, been certified by the KCMA testing program.

Unscrupulous vendors have been known to use bait and switch techniques in selling. They may have KCMA cabinets on display, however, you may buy a slightly different cabinet or a line which is not certified.

Cabinet Hardware

By
©1993-2012 Tim Carter

Summary: Cabinet hardware can add to the decor of your room. The proper kitchen cabinet hardware will not only add to the appearance, but the cabinet hardware knobs or cabinet hardware pulls must be selected for the ease of the user. You can purchase antique cabinet hardware to compliment your home.

I'd hate to have to think how much cabinet hardware I've installed over the years. The primary location of most cabinet hardware is found in the kitchen, and I've installed more than my fair share of kitchen cabinets over the years. As you might expect, I've seen some amazingly gorgeous cabinet door hardware while doing some of these jobs.

Cabinet hardware knobs and cabinet hardware pulls can really make a kitchen or bathroom sizzle. You wouldn't think these common hardware items would do much for the large surface area of a cabinet door or drawer, but the best analogy I can give is makeup on a woman's face. Certain highlights, blush or just the right amount of eyeliner or eye shadow can pull your eyes to parts of a woman's face. These slight and subtle accents can completely transform what you see. The same is true for the small knobs, pulls and backplates you see on the large doors and drawers of cabinets.

You need to be very careful, though, when you go to install a cabinet hardware knob. I'll never forget ruining an expensive cabinet early in my career as a carpenter. I thought it would be a brilliant idea to drill the hole for the knob starting on the backside of the door. My thought was that if the drill bit slipped, it would scar the inside of the cabinet.

I was ill prepared for the blowout splinter and chip that happened when the drill bit blasted through the front of the cabinet door. The base of the knob was not large enough to cover the imperfection, and I had to purchase a replacement door. Years later, I discovered this was not necessary. I could have hired a furniture-repair wizard to come with his alcohol lamp and hard sticks of lacquer to make an invisible repair in minutes.

When you start to install cabinet door hardware, you need a few simple tools. You can buy a plastic marking template that allows to you locate, with great precision, the location of the hole for the door knobs or pulls. You can also purchase affordable brad-point drill bits that have a tiny point on the end of the drill bit. This point prevents the drill bit from drifting as you start the hole. It's best to use a variable-speed drill that allows you to drill slowly so you have maximum control.

If you desire the look of antique cabinet hardware, be aware that in many cities and towns there are specialty hardware stores. I'm not talking about a hardware store that sells nails, furnace filters and chicken wire. I'm talking about a business similar to Norwood Hardware in Cincinnati, OH. This is a place that has hundreds, no - thousands, of unique and magical pieces of cabinet hardware. Often these shops have a special area or product lines of authentic reproduction antique hardware. I have some of this exact hardware in my existing home, and plan to put it throughout my new home that I'm currently planning.

Bronze cabinet hardware as well as brass cabinet hardware seem to be timeless favorites. Not only are my wife and I attracted to these, but in all the years I was a builder, I would also venture to say that well over 80 percent of the cabinet hardware I installed was either polished brass, antique brass or a type of bronze. The comments that I heard from my customers was this hardware had a timeless look and feel and projected a sense of warmth in the room.

In some instances the hardware I would install was so beautiful, I would actually stop and stare at it after tightening the final screw. When you visit a real hardware store, not a home-center aisle that has hardware in giant bins, you'll see what I mean.

Be careful if you're attracted to discount cabinet hardware. It's often discounted for a reason. The overall quality may not be there. In the cases of hinges, they may be poorly engineered. The machining and finishing of knobs and pulls may be substandard. The hardware may be plated steel. If you want solid brass or bronze cabinet hardware, always take a small magnet with you when you shop. Test the metal to see if it's magnetic. If the knob sticks to your magnet, you know you're touching a plated item.

Some designers will often offer advice to make sure the hardware in a room matches other metals. For example, if you have a stainless-steel sink with a brushed-nickel faucet, you may be told that you need nickel cabinet hardware. While this may look great, you can mix and match metals in the same room, and the look can be stunning. We have antique bronze cabinet hardware in our current kitchen, yet we have a stainless-steel sink with nickel sink and pot-filler faucets.

Be sure to pay attention to cabinet drawer hardware. Make sure the actual knob or pull is comfortable to use. While form and style are very important, be sure the hardware doesn't become a hardship. Cabinet hardware for aging individuals is often pulls instead of knobs, as knobs can be challenging for older folks to grab. Imagine pulling out a heavy drawer using a tiny knob and you can see why it's easier to grab a looped D-shaped cabinet door or drawer pull.

Laundry Room Cabinets

By
©1993-2012 Tim Carter

Summary: Does your laundry room not have enough storage space? Consider adding wall cabinets to your laundry room layout. Laundry room cabinets can create the extra storage space for your laundry products.

DEAR TIM: It is time for new laundry-room cabinets at my home. But after looking at several laundry-room designs, I am convinced my current laundry-room layout is bad. I don't want to order new cabinets until I am sure the floorplan will work. What is involved in remodeling a laundry room? Do you have any laundry-room decor ideas that would make working in this space more pleasant? What type of cabinets would you consider if this were your home? Cindy S., Kinnelton, NJ

DEAR CINDY: I have to admit that all the years I built, I pretty much neglected the laundry room in the houses I worked on. My guess is that it stems from the fact that as a kid my washer and dryer were in our basement. The process of cleaning laundry seemed pretty insignificant.

But when I built my own home over 20 years ago, I moved the laundry room to the first floor by my garage. My wife and I thought we had the perfect laundry-room design, layout and cabinets. We were wrong. I am in the midst of a laundry-room remodeling job, and I am here to tell you that the cabinets we chose to use were greatly influenced by the mistakes we made in the past.

This laundry room is not yet ready for cabinets. Pipes, ducts and wires had to be moved to create the perfect layout and design.  PHOTO CREDIT: Tim Carter
This laundry room is not yet ready for cabinets. Pipes, ducts and wires had to be moved to create the perfect layout and design. PHOTO CREDIT: Tim Carter
Our laundry room became the overflow for all sorts of items beyond detergent and fabric softener. Pet supplies, light bulbs, picnic supplies, children's sports equipment are just a few things that you can find in our laundry room. They were all visible on top of the few cabinets we had and some open shelves I built a few years ago in a last-ditch effort to control the accumulation of things.

The new laundry-room wall cabinets are 42-inches tall. Standard cabinets are usually 30-inches high. We decided to take the cabinets to the ceiling so that every square foot of available space is used for storage. These extra-tall cabinets are gorgeous, and do not overpower the room. You should price these out for your job.

As for the layout of your laundry room, you may be able to relocate things with a little bit of work. In my case, we changed the location of the dryer, washing machine and a 48-inch sink base cabinet. The old layout had the washing machine and dryer immediately adjacent to the main pathway leading from the garage to the rest of the house. When laundry was being done, baskets and piles of clothes were in the way as you moved about the house.

If your laundry room is large enough, I feel that you should consider a folding surface for clothes as well as a sink to rinse things before you wash them. We use the deep stainless-steel sink next to our washing machine to clean all sorts of things that would otherwise be a hassle in our regular kitchen sink.

You want to have superior lighting and a bright color scheme in this room. Doing laundry is work, and you should make the environment as pleasant as possible. If you spend lots of time folding clothes in this room, then make sure you have convenient power for a radio or maybe a small television. These things will help take your mind off the mundane chore of folding clothes.

Laundry-room flooring is fairly important. You want a material that is durable and will not show dirt. We have a ceramic-tile floor that is a light mottled brown. It does a magnificent job of hiding dirt, and when it is time to clean it, a mop makes it look like new in minutes.

If you are relocating your dryer-vent pipe, place the top of it 42 inches off the floor directly behind the dryer. This will allow you to easily connect the smooth metal pipe as you slide the dryer into position. The building code requires that smooth metal pipe be used to vent dryers. Avoid using the collapsible plastic piping as it can be easily crushed as you slide the dryer back against the wall. If this happens, your dryer will not work properly causing you to waste lots of energy dollars.

Removing a useless small closet in our laundry room opened up enough space to permit us to install 5 linear feet of additional base cabinets in our laundry room. I installed a second sink here that will come in handy for any number of things. We also were able to install a new wall cabinet in this location where all pet food and supplies will be stored.

We also decided to install laundry-room organizers in a large closet immediately adjacent to the laundry room. This will help keep the clutter under control as the shelves and drawers make use of all the space in the closet.

If you are planning to build a new home and have large dogs, think about installing a rectangular shower basin that can be used to wash off muddy beasts before they come in and shake the brown muck all over your painted walls and wallpaper. You can bet I will have one of these things in my new home that is in the planning stage right now!

Kitchen Cabinet Remodel

By
©1993-2012 Tim Carter

Summary: What do you do when your kitchen cabinet remodel project goes bad? Kitchen remodeling is a major project. The national home center might not be the best contractor. If you have to pay-in-full up-front, you have no leverage if things to wrong. Will an attorney help?

DEAR TIM: My kitchen cabinet remodel job has turned into a disaster. I contracted the job through a national home-center chain who demanded I pay in advance for the entire job. There are numerous issues, and the granite top is sagging in the middle of my sink. My complaints are going unanswered. The installer will not come back, and my calls to the home center are getting me nowhere. Is it time to call an attorney? Should I sue to get my money back? What went wrong as I trusted the large national company? Andy E., Lexington, KY

DEAR ANDY: If I had a nickel for every letter and email I have received like yours, I would have my own private jet. The Better Business Bureau statistics echo this as complaints regarding home building and remodeling are always make the Top-Ten List of consumer issues. Let's put on the rubber gloves on and do an autopsy to discover what went wrong. It's important to find the cause, so this never again happens to you.

You undoubtedly had lots of anxiety going into this project as you indicated that trust was a major factor in your decision who to hire. My guess is that you did not know exactly what needed to be done on the job, so you wanted to go with a large branded company you thought would make your life easy. This, in my opinion, is a huge mistake. You always need to investigate what is involved, how things work and how to spot a pro from the get go. This way you protect your interests at all times.

A granite top like this must be installed on kitchen cabinets that are level and sturdy.  PHOTO CREDIT: Tim Carter
A granite top like this must be installed on kitchen cabinets that are level and sturdy. PHOTO CREDIT: Tim Carter
The actual cause of death was you making the payment in full at the beginning of the job. When you do this, the only leverage you have to make sure your kitchen remodel dreams come true is hope. You "hope" that all goes well and you "hope" you get what you paid for. Never again pay the full amount in advance for any remodeling job. It is unnecessary, and it puts you in grave financial risk.

It is reasonable to have to pay some money up front in rare situations. Your kitchen-remodeling job is one of them. If the cabinets you ordered were custom ones that are not normally stocked by the home center, then it is reasonable for them to request a 50 percent deposit to order the cabinets. It is reasonable for them to ask for a similar 50 percent deposit for the granite top as it will probably only fit in your kitchen. You should not forward any monies for installation labor - never. You only pay for labor once it is complete and satisfactory.

When you have the money in your possession, you have the power to get results. You can create a fair payment schedule that distributes a certain amount of money as the work progresses. If this means you have to make smaller payments every three or four days on smaller jobs, it is worth the inconvenience.

You said the home center demanded payment in full before the work progressed. I don't doubt that, but the marketplace is so competitive, it is possible you might have negotiated special terms that allowed you to make staggered payments as the work progressed. Use the economic law of supply and demand to your favor whenever possible. There are many other smaller professional remodelers who would have agreed to take your money as the job progressed.

As for calling an attorney, you can do that as a last resort. I believe you will discover that you will have to pay the attorney's fees no matter what happens. It is entirely possible you will spend thousands of dollars to get the same results as that you might do on your own by becoming the squeaky wheel that ultimately gets the grease.

Start by contacting your local Better Business Bureau to see if the national home center is obligated to enter into arbitration. Then contact the headquarters of the home center, fill out online complaint forms at their website, contact any local consumer reporters at your media outlets, visit websites where consumer complaints are lodged, etc. In other words, don't look like a doormat or otherwise you will become one.

When you decide to remodel your kitchen or any job for that matter, you can use professionals who will not demand full payment up front. They don't require this as they know the job will turn out fine, and that you will be satisfied with their work.

The key is to spell out in the contract what monies are due when. You must always hold back enough money to be able to finish the job at any point. If you give the contractor too much money, you loose your leverage. Imagine what might happen if the contractor gets injured on your job and you have to bring in another company to finish. You must always have that money needed to finish in your possession.

It is critical that you make timely payments when you say you will. This is paramount to the two-lane trust bridge between you and the contractor. You are trusting that the contractor will do great work and do it on time. The contractor trusts that you will do your part and make the correct payments on the day they are due. Remember that excuses are reasons for failure. Do not fail your contractor and he will not fail you.

Bathroom Vanity Cabinets

By
©1993-2012 Tim Carter

Summary: Selecting a bathroom vanity is a major decision. Bathroom vanity cabinets come in a variety of styles, sizes, options and more. Installing a bathroom sink vanity is easier if you follow these installation tips.

DEAR TIM: I thought the process of selecting and installing bathroom vanity cabinets for a remodeling project would be simple. It turns out bath vanities come in many different sizes with all sorts of different options. I cringe at having to install all of these things, and worry I will ruin any bath vanity cabinets I will buy. My wife wants all of the options, but I would prefer to buy one simple box I can nail to the wall. How do I solve this conundrum? Bob F., Norfolk, VA

DEAR BOB: The first thing you are going to do is tell your wife to pick out whatever vanities your budget will allow. The second thing is you are going to do some deep-breathing exercises and relax. Installing bathroom vanity cabinets is not as hard as it may seem. I feel you are suffering from a significant case of anxiety because you either lack the tools, skills or a combination of the two.

There are many different methods to properly install bath vanities, but I am going to share some of the tips that have served me well over the years. There is no doubt other carpenters may have techniques that will work faster and better. Perhaps you know a handy person in your neighborhood or at your place of work that can help you if you get into a bind.

This bathroom vanity cabinet is really three separate cabinets and two accessory pieces of trim. It took less than an hour to completely install them. PHOTO CREDIT: Tim Carter
One of the reasons you want to consider bathroom vanities that are made from multiple cabinets and parts is the finished look. By combining cabinets that have different depths to them, you can create a stunning bump-out look where the center sink-base cabinet projects just 4 inches or so into the room. Adding trim accessories creates the look and feel of true custom cabinetry.

When the countertop is formed to follow an extended profile, it looks rich and elegant. These small features make your home really stand out if and when you decide to sell. Think about it, anyone can get a straight countertop out of a box from a home center.

One trick, when working with different cabinets that need to be screwed together, is to remove all drawers and cabinet doors. This can be done easily with a screwdriver. Some cabinets have quick-release levers that allow you to pop a door off its hinges with no tools. Removing the doors and drawers prevents scratches and allows you to work on the cabinets with nothing in your way. The cabinet boxes are also much lighter.

I prefer to use squeeze clamps that have rubber tips to hold cabinets together in the exact alignment as I screw them together. Sometimes you can screw through the sides of the cabinets to draw them together. Other times you have to carefully install screws through the finished frames. If you need to do this, take your time and be sure the length of the screw is not too long to where it passes through the finished side or front of a cabinet frame.

It is extremely important that the finished bathroom vanity cabinets are level side to side and front to back. This can be a significant challenge as floors are frequently out of level and walls are not plumb or square. Use tapered shims under the cabinets to get them level. You may have to install shims between the back of the cabinets and the finished wall to keep the cabinets level as you screw them to the wall. Yes, screws not nails.

Some bath vanity cabinets come with fancy trim that can be added on the face of the cabinet frames. This trim can sometimes be attached to the cabinets with screws from behind. Once again, be careful about the length of the screw. Always clamp the piece in position and slowly install the screw. You can rent nail guns to attach the trim, but be sure you use a pin nailer that shoots nails that are not much thicker than the shaft of a needle.

If the total width of the assembled bath vanity cabinets is 5 feet or less, I would screw them together and install the system as if it were one box as you originally wanted to do. The trick is to install no less than six screws through the sides of the cabinets where two cabinets touch one another. This way, when you start to move the cabinets around, they are very sturdy, and they should not pull apart.

If you have an accident and crack a cabinet frame, ruin the finish of a cabinet side, frame, door or drawer, do not panic. If you live in a mid-sized or large city, there are any number of wizards who can come to your home and repair this damage with little effort. These furniture repair masters come with a small box loaded with sticks of colored lacquer and an alcohol-fueled lamp that they use to match the color and wood grain of your cabinets.

They can repair holes, scratches, dings and splits making the cabinet appear as if it is in perfect condition. This safety net should give you the confidence to move ahead on this project.

Cabinet Knobs

By
©1993-2012 Tim Carter

Summary: Cabinet knobs, especially kitchen cabinet knobs, are very important pieces of hardware. But cabinet knob placement is an issue for many, as some people just don't know exactly where to place the knob on the cabinet door. Kitchen cabinet knobs and pulls can be installed professionally, if you use a handy template and the right tools.

DEAR TIM: I am struggling with cabinet knobs on my new kitchen cabinets. The cabinet knob placement has me scratching my head. How do you know where to place kitchen cabinet knobs and pulls? Should I use cabinet knob backplates? Can you tell me the proper way how to position cabinet knobs? Lois M., Canton, GA

DEAR LOIS: You are by no means the first person to struggle with cabinet knobs. I have seen knobs placed in all sort of places on cabinet doors, but there is a standard many carpenters seem to follow that has worked well for me and many of my customers over the years.

This cabinet knob is being installed by master carpenter Manfred Ellers. You can do it yourself so long as you take your time and use the right tools. PHOTO CREDIT: Tim Carter
Cabinet knobs are a great example of a utilitarian item found in just about every home that is a crossover between function and form. The knob performs a very important job by allowing you to easily open a cabinet door. But at the same time, the knob needs to look good , and more importantly, its placement on the door must look right.

I am a huge proponent of function being more important than form. When you think about cabinet knob placement, you want the knobs at a height where they are comfortable to reach, and they provide the greatest amount of physical advantage or leverage when opening the door.

The farther away the knob is from the hinge, the less effort you need to open the door. You can prove this easily by placing a knob on an old cabinet door. Put the knob in the center of the door and you will quickly see it takes far more effort to open the door than if the knob is on the outer edge of the cabinet door frame away from the hinge.

The cabinet knobs for kitchen wall cabinets seem to work very well when they are placed somewhere between 2.5 and 3 inches up from the lower corner of the cabinet door opposite the hinge side of the door. Since many cabinet doors have frames that surround a raised decorative panel, center the knob on the frame or flat area of the frame. Many cabinet door designs are different, so carefully look at the knob on the door before you make the final decision.

The cabinet knobs for kitchen base cabinets are placed somewhere between 2.5 and 3 inches down from the upper corner opposite the hinge side of the door. When knobs are placed in these locations, you will discover that your hand comfortably can grab them without your arm stretching.

Cabinet knob backplates can be very useful. They often prevent dirt and grease from fouling the cabinet door finish. Some people do not like the look of backplates, as they can make the cabinet door look hardware heavy. I would suggest testing one to see how it looks on your cabinet door. Install a knob with a backplate on one door and then a knob on another door nearby and see which one makes you feel better.

You can use a tape measure and a pencil to make a mark on the cabinet door showing you where to drill the hole for the screw that holds the knob in place. But let my voice of experience tell you that this can be dangerous. If you are tired, distracted or just make a mistake, a knob will end up in the wrong place. It is better to use a template that fits over the corner of the door. The face of the template has a hole in it at the precise location where the knob will be. You then trace the outline of the hole with a pencil and drill a perfectly-located hole each time.

Master carpenter Bob Schmidt is using a handy template that tells him exactly where to drill the hole for the cabinet-knob screw. PHOTO CREDIT: Tim Carter
Plastic templates can be purchased at many hardware stores, home centers or fine hardware stores where you can buy premium cabinet knobs. The plastic templates are inexpensive and allow you to drill holes in the template for different locations to match your final decision on cabinet knob placement. I prefer to place masking tape over any extra holes so that only the hole I want to use is open. This prevents errors.

Be sure to use the proper length screws for cabinet knobs. The fastener must penetrate into the knob a minimum of 1/4 inch. Be careful when tightening the screws. Use screwdrivers that fit into the screw slot tightly. If the screw driver slips as you twist that final partial turn, the screwdriver can slip off the screw and scratch the inside of the cabinet door.

Drilling the hole for the knob should be done very carefully. The drill bit should be the same diameter of the screw or possibly larger by only 1/64th an inch. Drill from the front of the cabinet door to the back, but apply minimal pressure as you complete the hole. If you push too hard as you drill, the drill bit will explode out the back of the cabinet door leaving an ugly mess of splinters and chips of wood. Often the screw head will not cover the damage.

Bathroom Cabinets

By
©1993-2012 Tim Carter

Summary: Bathroom cabinets are not the simple boxes you may have seen years ago. Bathroom vanity cabinets can be purchased in any size and style that you can dream of. Don't hesitate to use bathroom wall cabinets if you need extra bathroom storage cabinets. If you need to save money, painting your existing bathroom cabinets may be a smart move.

DEAR TIM: The bathroom cabinets I saw at the home center are not going to work for me. I have dreamed up a clever L-shaped design for my new bathroom, and I need bathroom vanity cabinets that are crazy sizes. Is it possible to buy these as well as bathroom wall cabinets? What else can I do to make my bathroom appear as it is indeed one-of-a-kind? I want to splurge, so don't hold back on any of your ideas. Connie B., West Salem, WI

DEAR CONNIE: I get really frustrated when people ask for me to do a brain dump of all of my ideas, but am only given precious few words to do so. Books have been written about bathroom remodeling, cabinets and design possibilities, so I have my work cut out for me.

First, you absolutely can purchase any custom-sized cabinet you need. You can get special widths as well as depths. The depth of the cabinet is very important, especially in an L-shaped design. Smaller bathrooms don't always have the width to allow standard-sized cabinets to be used in this configuration. You will probably discover you need to use a cabinet or several cabinets that are only 15 inches deep.

These semi-custom bathroom cabinets were ordered to fit precisely into the tight space. The upper cubby shelves were made on-site from stained wood provided by the cabinet company. PHOTO CREDIT: Tim Carter
Be aware that bathroom cabinets are also available in kitchen-cabinet heights. A 34.5-inch-tall cabinet allows you to have a 36-inch-high finished counter height if you use granite or some other material that is 1.5 inches thick. Many people have come to appreciate higher bathroom cabinets and tops.

Several high-end cabinet manufacturers produce a wide variety of accent trim pieces that allow you to make the cabinets look like furniture. Imagine an accent piece of wood that resembles a twisted rope. You can have that trim piece applied to the cabinets to hide the seams between two separate cabinets. This look can be stunning.

Consider custom shelving that rests on the countertop on either side of the sink. This shelving can act as a giant frame around a tall mirror that makes the bathroom seem 30% larger than it actually is. Some bathroom cabinet manufacturers will make this shelving for you, while others will supply you with the needed material that has been stained and finished to match the cabinetry. A good finish carpenter should be able to assemble simple shelves in one day or less.

Consider natural stone for the countertop and the floor. You can buy granite tile squares that compliment the color and texture of the cabinets you select. Don't hesitate to look at painted cabinets as well as natural wood cabinets. Painted cabinets that have a slight accent glaze can really go a long way to help you achieve your ultra-custom look.

This deluxe faucet is from the ShowHouse series by Moen. Its polished-nickel finish is stunning. The faucet actually swivels to make cleaning the sink easy. PHOTO CREDIT: Tim Carter
Pay attention to detail when it comes to your bathroom plumbing fixtures. There are high-quality faucets available in traditional or sleek contemporary designs. I personally love the new polished nickel finishes. The color of the polished nickel finish is regal. I think you should also be aware that certain faucet manufactures offer a complete line of trim fixtures that match the faucets. You can get towel bars, toilet-paper holders, shelves, etc. all in the exact same design and finish.

Don't forget about your walls and ceiling. All too often people seem to overlook wallpaper. Wallpaper, in my opinion, can create a mood and feeling that adds to the elegance created with the cabinets, countertops and flooring. Be sure to use a new non-woven wallpaper. These wallpapers do not expand when the adhesive contacts the paper. This feature allows you to easily remove the wallpaper from the wall and reattach it if there is ever a need to do a plumbing or electrical repair behind the wall.

Consider a wallpaper mural for the ceiling, if it fits into your overall look. Modern adhesives will allow the mural to stay attached to the ceiling, especially if you use the proper-sized ventilation fan to remove moist air created during bathing or showering.

I love the bathroom exhaust fans that are located in the attic space away from the bathroom. They are extremely quiet and vacuum copious amounts of air from the bathroom through insulated flexible piping. This air must be piped through the roof or sidewall of your home. Do not allow it to escape into the attic space.

Create a unique design using different-colored granite or tile on the floor or even the shower wall. Use these wide-open spaces as a place to express the look and feel you want. Modern ceramic-tile wet saws allow a craftsman to easily cut pieces of tile or natural stone into any number of sizes and shapes. If you do not have a creative bent, think about hiring a designer to transform the floor or wall into a masterpiece. I guarantee you it will get compliments from anyone who sees it. But if no one does, you get to enjoy it all by yourself!

Medicine Cabinets

By
©1993-2012 Tim Carter

Summary: Medicine cabinets are often overlooked by homeowners. Bathroom medicine cabinets can be found in just about any shape, style or size. Recessed medicine cabinets are popular because they are sleek. Mirrored medicine cabinets don't have to be plain, get one that has gorgeous beveled glass.

DEAR TIM: I went to look at medicine cabinets this weekend. All of the bathroom medicine cabinets in my home are beat up and dated. Recessed medicine cabinets seem to be much nicer than surface-mounted ones. How hard is it to install a recessed medicine cabinet? If I purchase mirrored medicine cabinets, will all of the glass make them too heavy? Are there any unpleasant surprises that might spring up on a simple remodeling job like this? Diane H., Sacramento, CA

DEAR DIANE: If you want surprises when it comes to medicine cabinets, wait until you remove one from an old home and see all of the discarded double-edged razor blades that are waiting for you behind the plaster. Those of us who grew up in older homes can still remember the tiny slit in the back of medicine cabinets where razor blades were placed instead of garbage cans. Razor blades in garbage cans can be very dangerous, so medicine cabinet manufacturers of old thought it was a great idea to place the dull blades in a wall cavity where no hands could get cut.

Medicine cabinets still serve the same purpose and tease curious visitors. A recessed cabinet like this one offers a slimmer profile. PHOTO CREDIT: Tim Carter
I hope you didn't purchase your medicine cabinets yet. If you visited a home center, you only saw a very, very small percentage of the amazing selection of medicine cabinets that are available. As time goes on, I am constantly surprised at how the selection of products gets wider and wider. Years ago, you could maybe pick from 20 or 30 different styles of medicine cabinets. Now there are well over 100.

Who would think you could find a distinctive wood-framed medicine cabinet that would look perfect in a Victorian home? Not only are they available, the woodwork trim around the cabinet looks like it is 120 years old. Even the surface-mounted hardware door latch looks old!

I agree with you that recessed medicine cabinets look better than surface-mounted ones. The surface-mounted cabinets serve a market where cutting into a wall is too expensive or not possible. They also provide instant gratification. If you need a functional medicine cabinet in ten minutes or less, screw a surface-mounted medicine cabinet to the wall and be done with it.

Recessed medicine cabinets are very easy to install if you are building a new home or are involved in a major bathroom remodeling project where the walls will be stripped to the studs and plumbers and electricians are showing up to do other work. If you want to talk about other surprises that await you in bathroom walls, wait until you start to remove the drywall and/or plaster and discover a plumbing vent pipe and/or electric cables feeding bath light fixtures or other rooms right where the recessed opening for the cabinet needs to be.

This is why you never want to cut haphazardly into a bathroom wall thinking you are going to install a recessed medicine cabinet. Always proceed slowly by taking off the drywall and plaster to see what you are up against.

Let's assume there are no pipes, electrical cables or heating ducts in your way. Your challenge will be to create the rough-in opening, or cavity, that the medicine cabinet will nest into. This is very basic carpentry, but can be challenging if the wall happens to be a supporting wall. If you have any doubts whatsoever, contact a seasoned remodeling contractor for advice. Offer to pay this person for his/her time to consult with you for an hour.

You can purchase a mirrored medicine cabinet with no worries. The weight of the glass is only an issue for you as you carry the cabinet from the store to your car and from your car to the bathroom. The weight of the mirrors can easily be supported by the walls. Be sure to use the screws provided by the manufacturer. Just pay attention to the written installation instructions and you will do fine. You must be sure the screws bite into solid framing material so the heavy medicine cabinet does not tip out of the wall cavity.

Many medicine cabinets come equipped with lights. All electrical connections must be done according to the National Electric Code. It is vitally important that any metal parts of the medicine cabinet are grounded, because of the electrocution hazard that is enhanced by the presence of water in the vanity sink.

The installation height of the medicine cabinet is very important. If your family has a mixture of tall and short people, be sure to think about getting a tall mirrored medicine cabinet that all will be able to use without stooping or standing on tip toes as they primp in front of the mirror.

Medicine cabinets don't have to be relegated to bathrooms. There are lots of other places in a home where you might want recessed storage and a handy mirror. You can purchase very affordable medicine cabinets that work great in sewing rooms, hobby areas and even workshops. The smaller cabinets are great places to store small items for any number of projects.

Garage Cabinets

By
©1993-2012 Tim Carter

Summary: Garage cabinets work well to get rid of clutter. Garage storage cabinets don't have to be brand new or expensive. Cabinets for garage storage can come from a kitchen remodel job or even an old house where gorgeous built-in cabinets are being demolished. The best storage cabinets for a garage, in my opinion, are old cabinets that can be used again instead of cluttering up a landfill.

DEAR TIM: Because of my tendency to keep too many things, I need garage cabinets. There seems to be an abundance of different garage-storage products, but once I start to price them, I quickly run out of money. What kind of garage cabinets would you suggest for a person who can't afford new, fancy cabinets? Are there things I should avoid? Can I just nail the cabinets to the wall? Kristin, K., Newfields, NH

DEAR KRISTIN: Garage cabinets are absolutely more popular now than I can ever remember. Many building-products manufacturers have started to respond to the marketplace demand of consumers like you. There are many types and styles of garage cabinets, and most of these can really cost a king's ransom once you design a complete solution for your garage. Add to this professional installation, and it takes no time whatsoever to get into four figures.

You have several highly-affordable options, if you want to clean up the clutter in your garage. The first places I would call would be local remodeling contractors, especially ones who specialize in kitchen remodeling. These contractors often have a constant supply of used kitchen cabinets they remove from homes. Frequently these cabinets are in very good condition, and when combined together, they can create a massive wall of cabinetry in a garage.

This garage cabinet was salvaged for free from a remodeling job. It is well-built, and the glass doors let you see what is on the shelves. PHOTO CREDIT: Tim Carter
Keep in mind that most kitchen wall cabinets are made in standard sizes. Often the cabinet box is 12 inches deep, and comes in different widths and heights. This means you can often combine cabinets from different kitchens and they will mate with one another nicely. You can often mix different styles, and the look is not too bad.

To solve garage clutter, don't think your garage has to end up looking like a kitchen. Keep in mind that you can easily stack wall cabinets on top of one another to create a solid wall of storage. Once the cabinets are fastened to one another and then securely fastened to the wall, you have a garage that may become the envy of many neighbors.

If you want open storage shelves, think about removing the doors from salvaged cabinets. There is no need to try to make shelves from scratch.

Used cabinets can sometimes be found at stores that sell recycled home building and remodeling products. We have several such stores in my city, and they offer unbelievably low prices for cabinets in great condition.

Cabinet companies and plumbing-supply stores that sell cabinets often have a dusty corner of a warehouse dedicated to damaged or mistake cabinets. You might be able to get workable cabinets for pennies on the dollar by visiting these stores or putting your name on a call list for when new cabinets are added to the bone yard.

If you can find a remodeler who regularly works on older homes and you are patient, you may get very lucky one day. Every now and then a remodeling job may involve removing old cabinets that were built-into the house. Most of these cabinets are premium quality made from old-growth lumber. Some often come with glass doors and cabinets with drawers and doors. I know of several houses where cabinets like this were doomed for the dumpster, the most recent one being a film location for a reality-television show.

If you work with old painted cabinets, be careful about the hazards of lead paint. Any cabinets made before 1978 might have lead paint on or in them. Any cabinets that were made and painted before WW II probably have multiple layers of lead paint. Sanding these cabinets can create toxic lead dust. If you need to refinish them, think about carefully removing the paint with chemical strippers. Be very careful, and follow all recommendations offered at http://www.epa.gov/lead.

Cabinets should never be nailed to a wall. Always use screws to attach cabinets to a wall. The weight of a single large wall cabinet and the things stored inside it can often exceed several hundred pounds. Nails can pull away from a wall without warning, while screws offer tremendous holding power. Be sure the screws penetrate through the cabinet and into solid framing lumber at least 1.5 inches. You will often discover the minimum length for a cabinet screw is 3 inches long.

Another way to locate good, used cabinets is to put the word out to all of your friends, neighbors, relatives and co-workers. I guarantee you one or more of them will know someone who is planning to remodel their kitchen in the near future.

Keep in mind that stained cabinets can be easily painted to make your garage look neat and clean. You do not have to paint the interior of the cabinet, just the exterior surfaces that you see.

Kitchen Cabinets

By
©1993-2012 Tim Carter

Summary: Kitchen cabinets are almost always the focal point of a kitchen. Some cabinets are more expensive than a new car. Quality ranges from poor to superior, so it is important to learn how to identify high-quality cabinets.

Kitchen cabinets are by and large the core of a modern kitchen. They are flanked by kitchen appliances such as the refrigerator, stove, cooktop, dishwasher and microwave, but in today's kitchen many of these appliances are encapsulated by the cabinets or made to blend with the cabinet finish.

Shopping for kitchen cabinets can be intimidating. There are scores of major cabinet companies, and many more smaller custom cabinet shops where you can get any cabinet made from any species of wood that your mind can imagine. Add to this the subset of laminated cabinets, and the choices are enough to bring the most savvy shopper to her knees.

Pricing is a fantastic way to categorize kitchen cabinets. As with many things, the higher-quality cabinets simply cost more money. It does not take much effort to spend tens of thousands of dollars on the actual kitchen cabinets.

Traditional kitchen base and wall cabinets come in standard sizes. The base cabinets are often 34.5 inches tall and 24 inches deep. They come in widths starting at 12 inches and can go up to 48 inches often in increasing width increments of 3 inches. Wall cabinets are often 12 inches deep and 30 inches tall. They also come in the same size widths as the base cabinets. Wall cabinets also come in several different heights ranging from 15 inches all the way up to 48 inches. It is not uncommon to find an even wider range of sizes with certain custom cabinet product lines.

Different semi-custom cabinet manufacturers make different-sized cabinets for all sorts of special looks and situations. It is not uncommon to have one cabinet extend beyond adjacent cabinets to create a distinguished look. It pays to shop around to see all of the different possibilities and special cabinet features offered by the custom-cabinet manufacturers.

One of the interesting aspects of true custom kitchen cabinets is the ability of the cabinetmaker to make one giant base or wall cabinet instead of separate boxes that are screwed together by the installer at the jobsite. A custom-cabinet maker can easily make one giant base cabinet 8 feet long that installs as if it were a piece of furniture. The same is true for wall cabinets. The advantage of this method is the lack of vertical seams where two traditional cabinet boxes would mate up to one another.

Pay particular attention to the materials used to build the cabinets. Lower-priced cabinets are made with minimal-quality engineered lumber. If you plan to load a wall cabinet with heavy traditional china, the weight of the dishes may cause the cabinet to pull apart over time. I have seen this happen on several occasions. Be very careful about storing china that has sentimental value in a low-cost cabinet.

Bathroom Vanities

By
©1993-2012 Tim Carter

Summary: Bathroom vanities are important fixtures in bathrooms. It pays to buy a quality vanity, especially one that has a timeless design. You can make a bathroom vanity from other pieces of furniture.

Bathroom vanities are a core fixture found in just about every bathroom. The bathroom sink is supported by the vanity, and the cabinet conceals the plumbing water supply lines as well as the drain line. The bathroom vanity cabinet plays a big roll when it comes to the overall design of a bathroom. Pick the right vanity and it can make a dramatic statement if you have both good taste and a generous budget.

Many consumers are unaware there is a vast difference in quality when looking at bathroom vanities. Mass-produced vanities are often very inexpensive, and can be found at home centers. Semi-custom bathroom vanities can be ordered at kitchen and bath showrooms that represent various cabinet manufacturers. You will pay more for these, but the higher quality is noticeable. You can also find cabinetmakers that will build you anything you can dream in your head. What's more, they can build the vanity from just about any material. A custom bathroom vanity can become a permanent fixture in a bathroom if it is built well and has a classic design.

Don't think that you must use a standard vanity cabinet when it comes time to furnish your bathroom. You can use just about any box to create the needed support for the countertop that sits on top of the vanity. I have even used a gorgeous chest of drawers to make a vanity cabinet.

If you use a vanity in a bathroom, you will want drawers with it if you have the room. But a powder room or hallway bath for guests might not need a vanity with pullout drawers. Keep this in mind as you look at different vanities.

Trends change as people grow tired of a look. Bathroom vanities that resemble furniture, instead of just a traditional box cabinet, often are timeless. These stylish vanities never seem to go out of style, and people who see them often comment on their beauty and functionality.

Easy Access Cabinet Drawer

By
©1993-2012 Tim Carter

Summary: Cabinet drawers in the kitchen will make life easier for you. Storage cabinet drawers, instead of cabinet shelves, allow easier access to your kitchen items, including pots and pan. Be sure to get ball-bearing cabinet drawer glides so the box drawers open smoothly even when loaded with heavy cook wear.

DEAR TIM: I’m in the market for a new kitchen. As I get older, I’m not getting any more limber. A kitchen designer was singing the praises of using one or more cabinet drawers to gain easy access to pots, pans, appliances, etc. inside of my new cabinets. I’ve always had shelves inside my cabinets. Would a cabinet drawer be able to handle nearly a hundred pounds of heavy pots and pans? If so, what other cabinet drawer accessories might be available? Connie P., Chattanooga, TN

DEAR CONNIE: I can surely identify with your observation about age and how joints don’t seem to bend as much as they used to. What’s more, have you discovered yet that when you bend down and try to get up that gravity seems to pull harder than ever? If not, you will. I sometimes feel like I live on the planet Jupiter, where gravity is many times stronger than it is here on Earth.

This kitchen cabinet has four drawers that operate on smooth rollers all of which are hidden behind a swinging door . PHOTO CREDIT:  Tim Carter
This kitchen cabinet has four drawers that operate on smooth rollers all of which are hidden behind a swinging door . PHOTO CREDIT: Tim Carter
You’re going to thank your lucky stars that your kitchen designer crossed your path. Our current kitchen has nothing but drawers in every cabinet. We have a wood cabinet drawer, often several, in each and every cabinet in our kitchen. I have to tell you that when my wife Kathy ordered all of them, I didn’t think it would make my life easier. Oh well, yet another time she was right and I was wrong.

To really appreciate what I’m talking about, you have to look at how the cabinet drawers operate. Low-quality cabinet drawers open and close with a simple wheel or two that rolls in a channel that’s screwed to the sides of the cabinet. The drawers, both exposed and hidden inside the cabinets, operate on precision cabinet drawer glides that have countless ball bearings inside them. They glide effortlessly and are built to last.

Don’t confuse the drawers I’m talking about with the traditional box drawers you’ve seen for years in kitchen cabinets. Yes, we have a few of those traditional drawers. But the majority of the drawers in our cabinets are what I call hybrid shelves. These drawers are boxes indeed, but they have shallow sides, perhaps only three inches deep or so. Large items can be easily stored on and in them and you can grasp the sides of these things when the drawer slides open because nothing is blocking you.

My favorite cabinet in our new kitchen is the multi-drawer cabinet that’s next to our microwave cabinet. I might add that even our microwave is one that has a drawer. Instead of a swinging door like many, when you open our microwave the entire front of the appliance slides out revealing a drawer platform.

Anyway, this cabinet next to the microwave has four hidden drawers behind a large swinging door. There are four drawers that glide out with ease. Two of the drawers store all of our everyday plates, bowls, cups and saucers. The other two drawers have all of the wraps, foils, sandwich bags, garbage can bags, etc. Besides the traditional silverware drawer, these hidden drawers get the most use in the kitchen.

Tucked cleverly under the gas cooktop you’ll discover a drawer that has all of Kathy’s cooking weapons. I call them that because some of these tools look fierce and many have sharp moving parts. This drawer has an assortment of built-in dividers that allows you to segregate the tools so they are easily found. In the back of this drawer is a handy compartment for the hand whisks Kathy uses to whip eggs and all types of other sauces.

Beneath this tool drawer you’ll discover 3-foot-wide drawers where all of the heavy pots and pans are stored. Once again, these drawers open and close with ease and are unaffected by the weight of the heavy stainless-steel cookware.

Be sure to visit several cabinet showrooms and ask the salespeople there to show you as many different cabinet drawers as they can. Once you do this, you’ll discover uses for drawers that you never imagined. I can tell you that don’t miss bending down hearing my knees crack and pop or getting on my hands and knees to see what’s deep inside a base cabinet. With drawers, you just pull it out to get what you need.

One of the cabinets we have in our new kitchen is a large vertical pantry cabinet. This cabinet has five different hidden drawers in it. Many of our dry foodstuffs are located here. Fortunately for us when this cabinet was ordered the first time, it came too big. Our kitchen designer forgot to take into account the heavy woodwork of a nearby arched opening into our dining room.

The contractor had to order a new cabinet and told us the old one was ours to do with what we wanted. The drawers worked so well, I removed them from the cabinet and put them inside a pantry on the other side of the kitchen. Kathy loves those extra five drawers as do I. They make it so easy to see what you have instead of things getting lost on deep shelves.

Cabinet Installation

By
©1993-2012 Tim Carter

Summary: Cabinet installation requires close attention to detail. If the cabinets are not properly aligned, your countertop will not fit. If the wall cabinet installations are not correct, the cabinets could fall once loaded with your dishes. Install cabinets with care and you can achieve a professional looking job.

DEAR TIM: Can you give me some tips about cabinet installation? I’ve never had to install a cabinet, and need to ensure that mistakes will be minimal as I install cabinets in my kitchen. I’m attempting this after getting a bid from a cabinet installer that took my breath away. He said my kitchen cabinets install job was not that hard, so I expected a lower number that I could afford. What tools do I need for my kitchen-cabinet installation? Kelly K., Beloit, WI

DEAR KELLY: DIY cabinet installation jobs can range from simple to extremely difficult. Without seeing the plan of your kitchen and the cabinet layout, I can’t say whether you’ll be able to successfully complete your kitchen cabinets installation. I’ll tell you right now that the odds are against you, but every now and then the long shot crosses the finish line first. I’ll help you in this very short column be the filly that finishes this job to the amazement of all!

For your job to go as easy as possible, you’ll need an assortment of cabinet installation tools. I recommend these basic tools: accurate 2 and 4-foot levels, a power drill with bits up to 1/4-inch in diameter, several squeeze clamps with jaws that open at least 6 inches, a power screw gun and a belt sander. You may discover you need a table saw or other power saws to cut trim lumber and filler strips.

These cabinets are perfectly level side to side and front to back. That’s mission critical when natural stone tops will rest on them. PHOTO CREDIT:  Tim Carter
These cabinets are perfectly level side to side and front to back. That’s mission critical when natural stone tops will rest on them. PHOTO CREDIT: Tim Carter
Your cabinets may come with their own screws. If they don’t, follow the written instructions from the cabinet manufacturer with respect to the screws needed for all your wall and base cabinets. Wall cabinets must be mounted to the walls so they will not fall when loaded with heavy dishes. Avoid the temptation to use common long drywall screws. These are typically not strong enough to secure wall cabinets. Three-inch screws are needed to mount wall cabinets to wall studs. You’ll use smaller screws to fasten cabinets to one another and for other purposes.

Every carpenter will have his own tips for wall-cabinet installation, but I discovered long ago that it’s infinitely easier to install wall cabinets first. If you have the base cabinets installed, you have to reach over them and constantly worry about scratching the base cabinets. It’s possible to hang wall cabinets with no help, but I’d recommend getting two helpers to hold them up while you fasten them to the wall. Always remove the cabinet doors while attaching them to the wall. This makes the cabinets lighter, and it prevents damage to the doors, hinges and the cabinet frames. Make sure the wall cabinets are level as you install them.

For a professional fit and finish, you should screw the cabinets to one another so the face frames are flush and the gap between individual cabinets is closed. You’ll use the squeeze clamps to align and hold the frames in place as you screw the boxes to one another.

Once the wall cabinets are installed, you can start on the base cabinets. These cabinets must be installed level both side to side and front to back. This means that you must locate the highest point of your floor and start there with your first base cabinet. If you fail to do this, the only way the top of the cabinets will be level is if you shave off the bottom of the cabinets. I wouldn’t wish this fate on my worst enemy.

Wood shims are used to level base cabinets. These thin wedges of wood allow you to easily adjust the height of the cabinets. As you get the cabinets level, you screw them to each other making sure the face frames are flush and the gap between cabinets is closed. The squeeze clamps will become your best friend. Make sure they have rubber tips so the cabinet frames are not damaged. Keep the clamps in place until all screws are driven between the cabinets. Once all the base cabinets are screwed to one another and in the perfect position, you can screw them to the walls.

Most cabinet installation jobs require that filler strips be used. These are normally up to 3-inches wide, and are the same material and finish as the cabinets. If cabinets fit tightly between two walls, you’ll commonly need to install a filler strip on each side of the cabinet that’s closest to the wall. This centers the cabinets on the wall to make for a professional look.

These filler strips require great skill when installing them. They frequently need to be custom cut and scribed as they are rarely shaped like a perfect rectangle. A table saw and belt sander come in handy when trimming and fitting filler strips.

Be sure that the screws used to secure cabinets to walls penetrate into the center of the wall studs. Take your time locating the center of the studs. Wall-cabinet screws need to penetrate at least 1 and ½ inch into the actual stud. You’ll discover that you need at least a 3-inch screw to achieve this requirement.

Buy it Now